
PhotoLesa's photography gear provided by:


One of the many cool digital SLR lenses on the market today are Lensbabies. It's a bendable lens, if you can imagine, that actually lets you control which area of the photo is in focus. Once you get the right angle, you lock the lens into place and snap your shot. It's very cool but since it's a proper lens, it carries a proper price. It's not outrageous, but at about $300 it's not what I'd call an impulse buy.
I've been wondering how hard it'd be to recreate the effect in Photoshop, and wouldn't you know that I came across the perfect method while strolling through the How to Wow Photoshop for Photography book by Jack Davis and Ben Willmore.
This technique is really easy to create and it's great for drawing the viewer's eye to a particular area of a photo. It allows you to control which area of the photo is in focus, while the rest of it is blurred pretty severely. Because we'll create the effect on an Alpha Channel, we'll build in maximum tweakability. Let's give it a try!
What the heck is an Alpha Channel?
There are three different kinds of channels in Photoshop: color, spot, and alpha. All images are made up of a certain base set of colors and if you pop into the Channels palette on any given day you'll see a channel for each color that image sprouted from. The color channels are easy: If you're working in RGB mode, you'll see a Red, Green, and a Blue channel, as well as an RGB channel which shows what the image looks like when they're all turned on. If you're working in CMYK mode (used in printing), you'll find a Cyan, Magenta, Yellow, and Black channel. Makes sense.
A spot channel, used in printing, lets you add non-standard color to a project, like a Pantone color. Pantone colors are what you need to use when a client insists upon a very specific shade of yellow for their logo. Using spot color would be the only way to 100% ensure that the print will turn out perfectly.
An alpha channel is something else entirely. Jack and Ben explain it as a "grayscale representation of a selection that can be used by certain Photoshop features." I'd say it's a way to select a portion of a photo using the Brush tool. It looks and works exactly like a layer mask, except that you create it in the Channels palette. Read on!
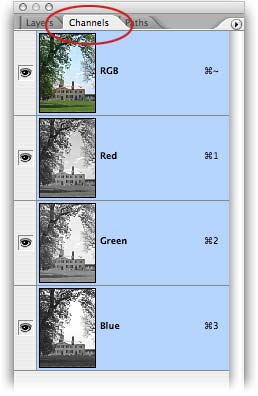
Step 1: Open the image and click the Channels tab at the top of the Layers palette.
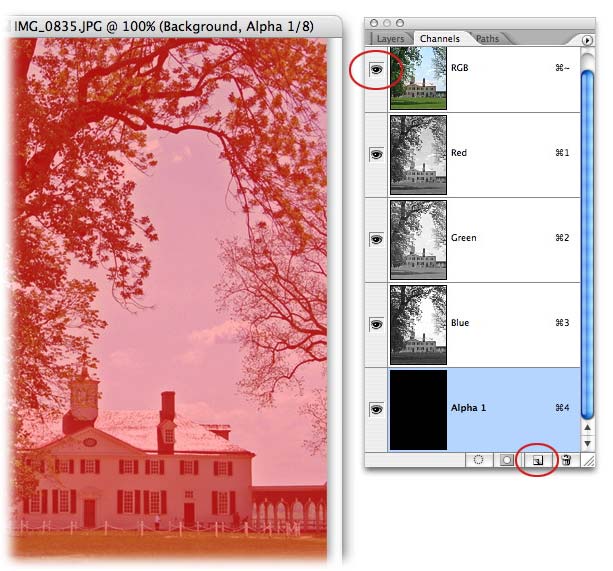
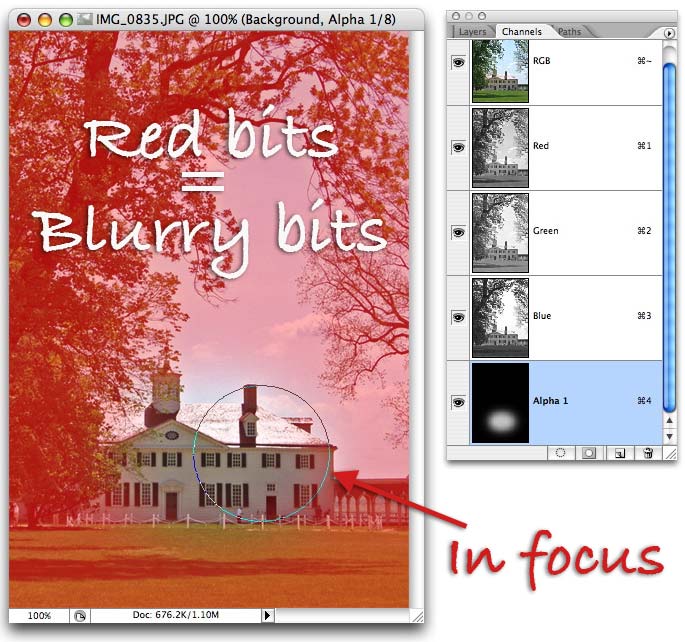
Step 2: Click the New Channel icon at the bottom of the palette (circled below in red) to create an alpha channel (it'll be solid black). Next, click the visibility eyeball next to the RGB channel at the top of the palette. Your entire image is going to take on a pinkish-red look. This is a visual representation of the alpha channel (breathe deeply—it'll make sense in a few).
Step 3: One of the cool things about using an alpha channel to make our selection is that we can use the Brush tool, instead of something evil like the Lasso or Pen tools (kidding). Go ahead and press B to grab the Brush tool and make white the foreground color chip. TIP: Press X to swap color chips until white pops on top.
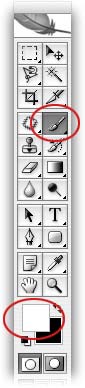
Step 4: Hop up to the options toolbar at the top of your screen and choose a nice soft brush (fuzzy edges rather than hard), and lower the Opacity to 50%. Press the right bracket key, ], to increase the brush size. You'll want something fairly large (note that mine is 175 pixels wide below).

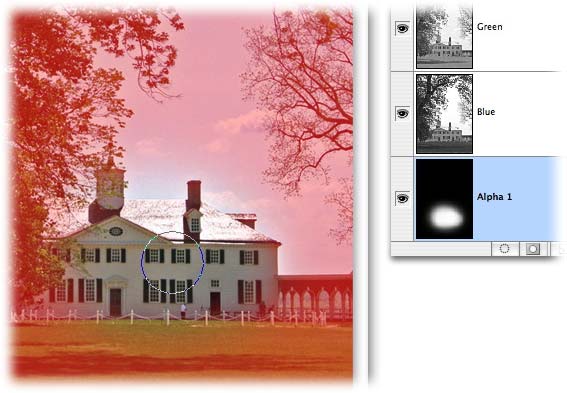
Step 5: Paint the areas you want to be in focus, such as George Washington's house below. As you paint, the photo will show back through. Anything that's red will be blurry.
Step 6: Decrease the brush size by pressing the left bracket key, [, and go back over the areas you want to be super sharp.
Step 7: When finished, turn off the visibility eyeball of the alpha channel, and click on the RGB layer to select it. Your photo should look completely normal again.
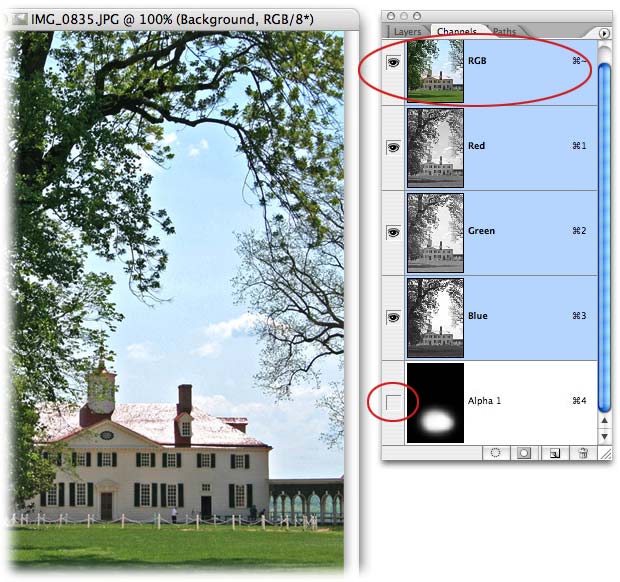
Step 8: Click the Layers tab at the top of the palette, and create a copy of the Background layer by pressing Command + J (PC: Ctrl + J). This simply protects us from ourselves in case we don't like the effect.

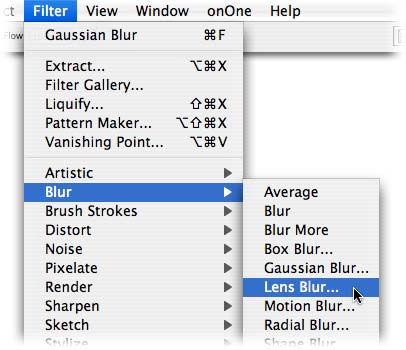
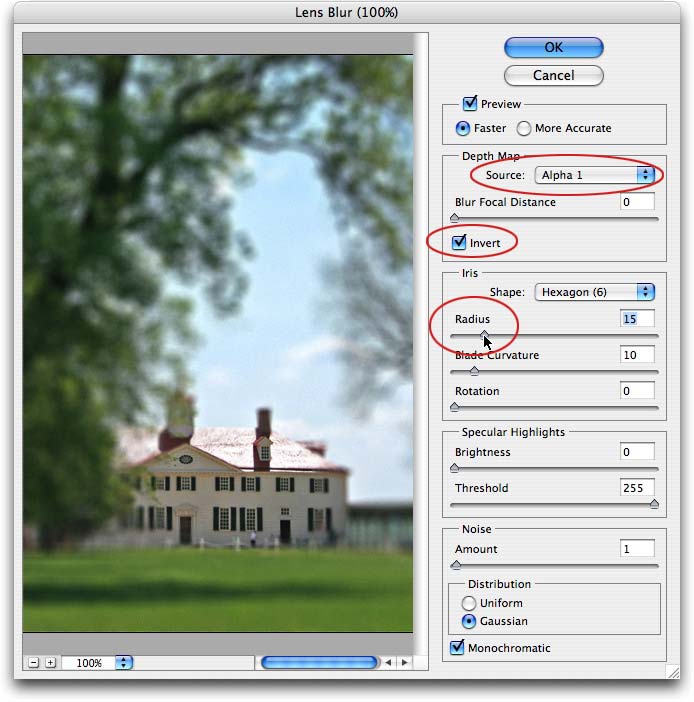
Step 9: Choose Filter > Blur > Lens Blur.
Step 10: Change the Depth Map source to Alpha 1, as shown below. Check the Invert checkbox below it so that the area you painted will be what's in focus, instead of the reverse. The Radius slider is how you determine just how blurry the background gets. The only other thing Jack and Ben suggest is to add noise to the blurry background. Do this by adjusting the Noise slider at the bottom, choose a Gaussian Distribution (whatever the hell that means!) and click Monochromatic. Honestly, I didn't like adding noise to photo, so I just left it at the default of 1.
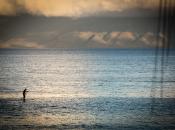
Here's my before and after:
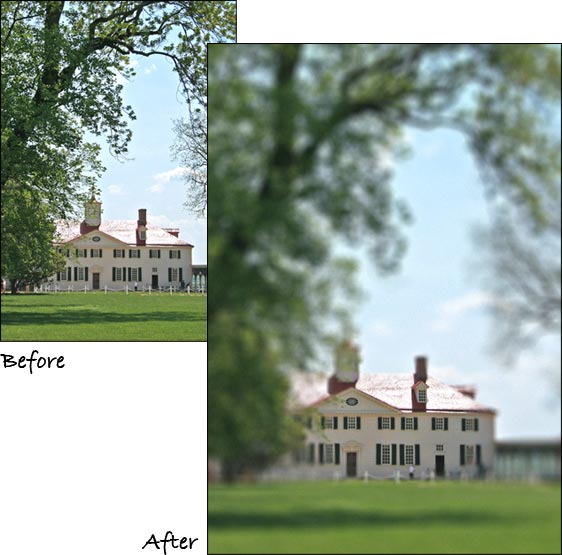
A hugely different image indeed! I really like this effect and since we created it using an alpha channel, it's tweakable. If you don't like what you've created, toss the duplicate of the background layer, go back into Channels, and toss the alpha channel. Create another one, and have another go at it.
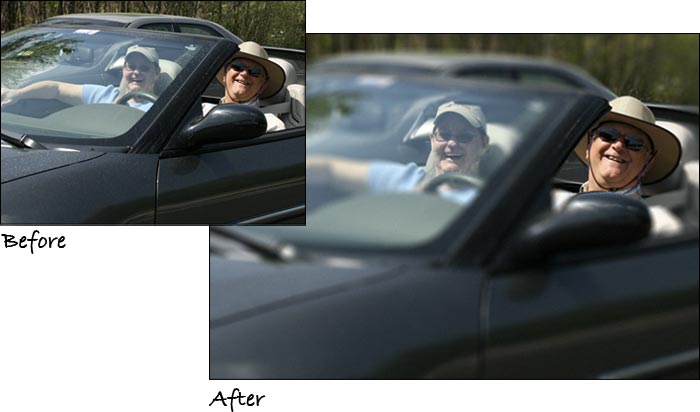
You wouldn't want to use it on every picture you take, but it can certainly enhance certain ones. For instance, you could use it to get rid of distracting areas. In the photo below, there was a fair amount of dirt on the car and windshield, so I used this technique to draw attention to my subjects, Ron & Pat Faquet:
And here's a shot I snapped while having dinner at the Chart House Restaurant. I took the shot on the inside of the restaurant, yet all the glasses on the table were distracting (okay, so we all had a *really* good bottle of '03 Syrah!):
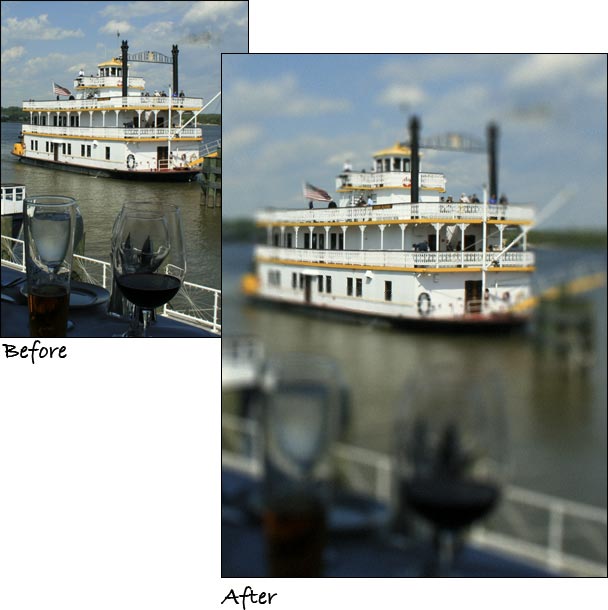
See what I mean? Just makes that focal point leap out at the viewer. Until next week, happy lens babying :)


PhotoLesa's photography gear provided by: