
PhotoLesa's photography gear provided by:


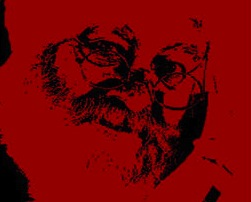
 The question, "How do I create a Che-Guevara effect?" appeared on the Planetphotoshop.com forums last week. It's an effect you've all seen on t-shirts: the high contrast face of the famous revolutionary on a red background. It's a neat effect which, as it turns out, is very versatile.
Duplicating the effect in Photoshop is shockingly simple: apply a Threshold adjustment to convert the photo into a high contrast black and white image. In playing around with this effect, myriad creative tricks popped into my head. I wondered what would happen if I applied it to festive, holiday-inspired art like, say, a photo of Santa Clause?
Therefore, today, dear grasshoppers, we shall create our very own Santa-Guevara, using a Santa photo I snatched from iStockphoto. By using the same Threshold technique, I'll also show you how to make the cutest floating Santa face this side of the Pecos.
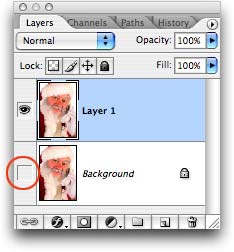
Step 1: In the spirit of covering our own you know whats, let's duplicate the background layer by pressing Command + J (PC: Ctrl + J). Turn off the visibility eyeball in the Layers Palette as we won't be needing it, unless we mess up.
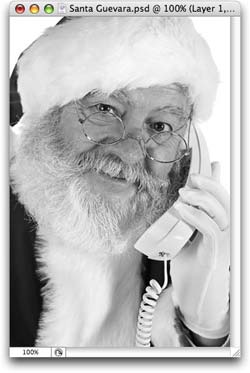
Step 2: Since Santa has so much pink in his cheeks, it will behoove us to convert him to grayscale before we go too far. There are many ways of doing this and if you're a seasoned pro, by all means, use the method of your choice. The fastest/easiest way is to choose Image > Adjustments > Desaturate, or to press Command + Shift + U (PC: Ctrl + Shift + U).
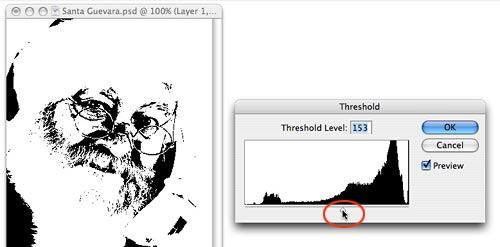
Step 3: Trot up to the Image menu and choose Adjustments > Threshold.
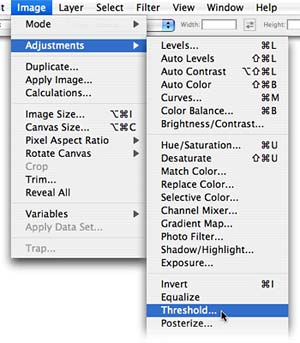
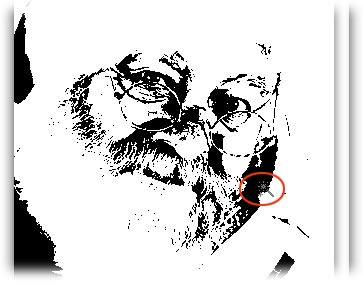
Step 4: In the resulting dialog box, adjust the slider until you have some nice high contrast in the face area, and click OK.
Now that we have the right look going on, we want to select the high contrast areas in order to isolate them on their own layer so we can do neat things like fill them with a color, add layers styles, or add another color background beneath it.
Step 5: When making a selection based on color, reach for your trusty Magic Wand. Select it by pressing W, and click inside one of the black bits of the image. You'll see little marching ants appear around it.
"But we want all of the black bits selected," you might be saying. Oh sure, we could accomplish that by Shift clicking all the other black bits individually, but gads, that'd be hours or days off your life that you'd never get back. Instead, hop up to the Select menu and choose Similar.

This will cause *all* other bits similar to what you've already selected to become selected themselves. Sweet!
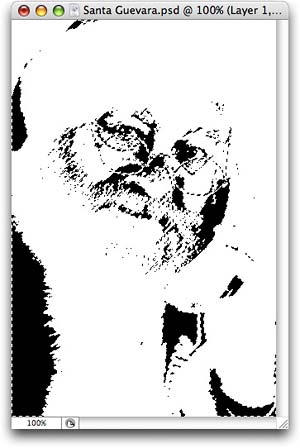
Step 6: Now that all the black is selected, create a new layer by pressing Command + Shift + N (PC: Ctrl + Shift + N), and name it Santa Guevara. TIP: Using this keyboard shortcut to create a new layer causes the layer naming dialog box to appear. Turn off the visibility icon of the original layer. This is what we have now:

Once the selection has been made, you get to decide which color you want to fill it with. For our Santa Guevara, we need black. NOTE: Yes this is what we started out with but the purpose of this tutorial is to show you the flexibility of this technique, which requires isolating the contrasty bits on their own layer so you can color them, apply layers styles, or whatever. Bear with me :)
Step 7: Press D to set your color chips back to the default of black and white, and press X until black is perched on top. Press Option + Delete to fill the selection area with black. Press Command + D to deselect and send the marching ants away.
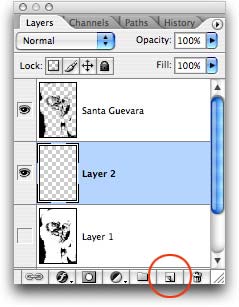
Step 8: Create a new layer directly beneath the Santa Guevara layer by pressing Command while you click the New Layer icon at the bottom of the layers palette. TIP: This will cause the new layer to pop beneath the current layer. You might want to remember that.
Step 9: Click the top color chip in your toolbar and pick a nice red. Press Option + Delete to fill the new layer with that color.
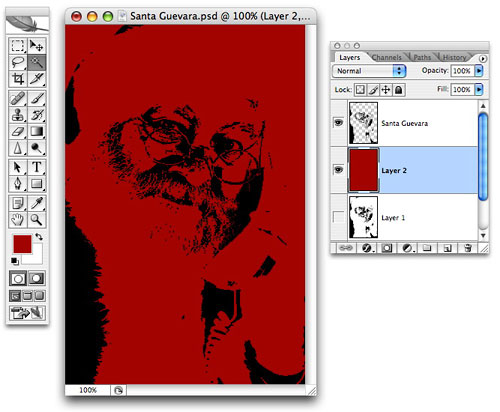
Poof! Santa Guevara lives.
More fun things to do with this effect might be isolating Santa's face for use on stationary or a holiday greeting card. Let us continue with the same file.
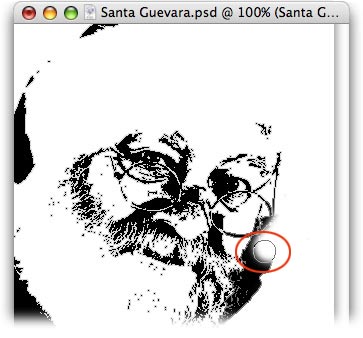
Step 1: Press X to swap color chips (they should still be red and white) until white pops on top (circled in red below). Fill the red layer with white by pressing Option + Delete.
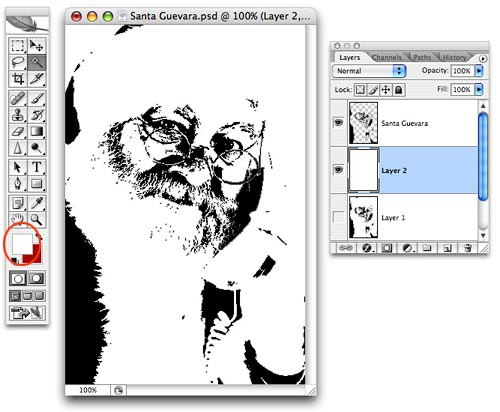
Step 2: Select the Santa Guevara layer and add a layer mask by clicking the circle within a square icon at the bottom of the Layers Palette.
Step 3: Select the Brush tool by pressing B and begin to paint the areas surround Santa's face, as shown below. Be sure to choose a hard edge brush from the options toolbar at the top of your screen because we don't want soft edges for this effect.

TIP: Press the left bracket, [, to cycle down in brush size, and the right bracket, ], to cycle up. Zoom in or out by pressing Command +/– (PC: Ctrl +/–).
If you mess up and mask something you shouldn't have, press X to swap color chips so that white is on top, and paint that area back in. Then, press X to place black back on top, and continue masking. Remember, when dealing with layers masks, black hides and white reveals.
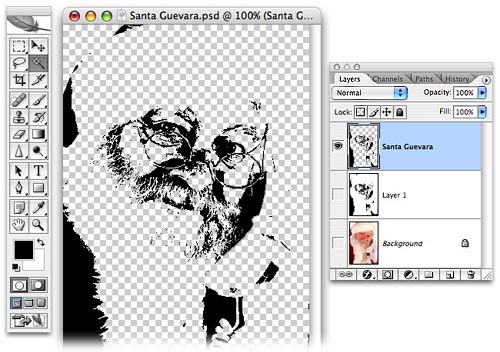
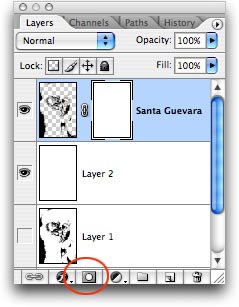
Step 4: Now that we have Santa's face isolated, select the image thumbnail in the Layers Palette (circled below in red), then press the little cursive "f" at the bottom of the Layers Palette and choose Drop Shadow.
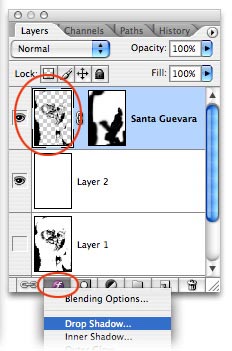
Step 5: Increase the softness of the drop shadow just a touch.

And here's our floating Santa face (albeit, somewhat disembodied):
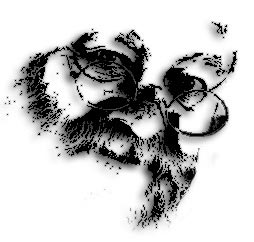
What a cute little addition to a holiday greeting or family stationary, and as you can imagine, the creative possibilities for this technique are endless. Enjoy!


PhotoLesa's photography gear provided by: