
PhotoLesa's photography gear provided by:


Adding color to a grayscale image is a neat little effect you see all over the place. Recently I saw it on a congratulatory wedding card where two cute little kids were all dressed up in pastel formal wear, while the rest of the background was draped in shades of gray. I've also seen it in movie posters, like Schindler's List. It's a really simple technique that's fun to use, it's great for creating visual interest, and drawing attention to a certain portion of a photo.
Admittedly, the process of colorizing a grayscale photo certainly seems straight forward enough, in that it probably involves grabbing a paint brush and painting color onto the image itself. The problem, though, is that while you would succeed in adding color to the photo, you would systematically destroy any detail it once contained.
Using the cutest photo *ever* (snatched from iStockphoto.com), I'm going to show you the trick to adding color while retaining all the glorious detail of the photo. As a bonus, I'll show you how to change your mind and recolorize the color you added to begin with. Though we'll be using Photoshop Elements for this tutorial the steps are *exactly* the same in Photoshop.
The very first thing we want to do is make sure the document is in color mode, and not grayscale. Else, we won't get very far and your frustration level with all things digital could reach an all time high :)
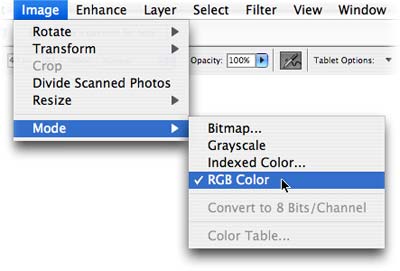
Step 1: Choose Image > Mode and make sure the document is set to RGB Color. If the document mode is Grayscale, you won't be allowed you to paint in color, which can be quite maddening.
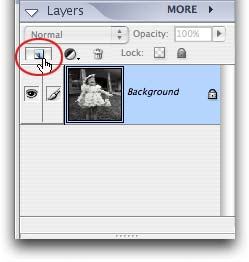
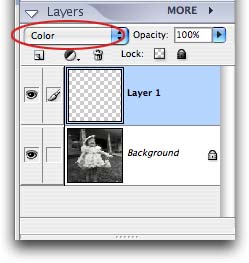
Step 3: Change the blending mode of the new layer to either Color or Overlay, as shown below. This will allow the detail of the image to show through the paint, instead of the paint being a solid coat.
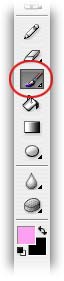
Step 4: Press B to select the Brush tool, and click on the topmost color chip in the main Toolbar. Pick a nice pastel color from the color picker and press OK.
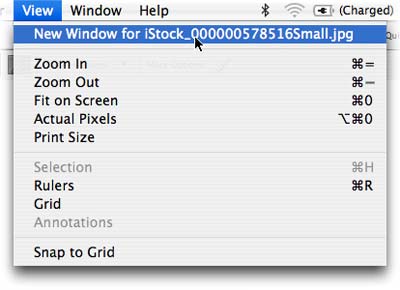
Step 5: Since we're about to embark upon a bit of detail work, I'm going to share a workspace trick with you before we start painting. Choose View > New Window for [insert image name]. This is going to allow us to be zoomed in really far on the image in one window, and still see what the image looks like at its normal size in another.
The neat bit is what you do in one window happens simultaneously in the other. So as I being to paint the little girls dress, this is what I see:
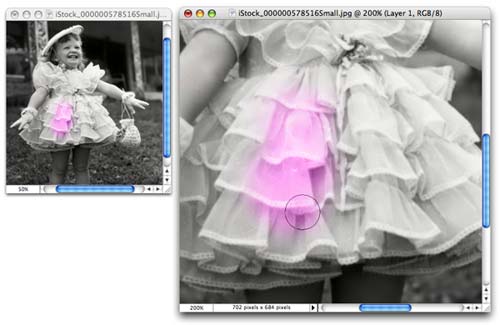
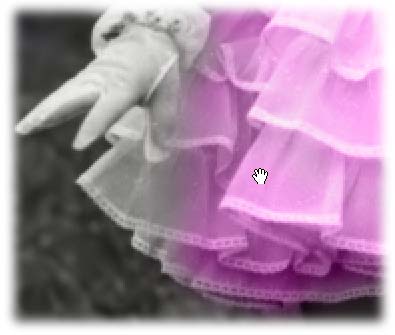
TIP: Press Command + (PC: Ctrl + ) to zoom in, and Command – (PC: Ctrl –) to zoom back out of your document. Another handy tip to remember while doing detail work is that while zoomed in on your document, pressing the spacebar turns the cursor into a little hand which you can use to mouse over to a different area of the image, like so:
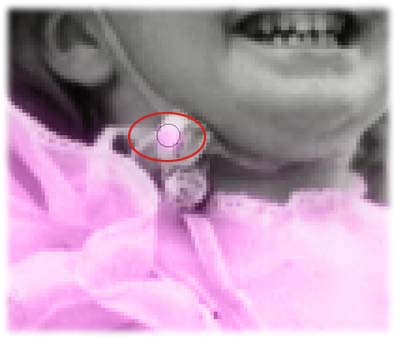
Step 6: As I move around in the image, I come upon places where my brush is too large, such as the little strap around her neck. Here I can press the left bracket, [, to cycle down in brush size, and later cycle back up by pressing the right bracket, ].
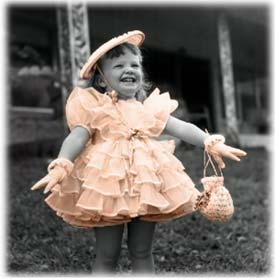
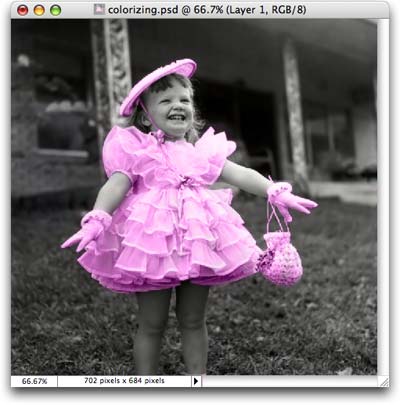
If you mess up during the painting process, just press E to select the Eraser and fix your mistake. Press B to pick the brush back up and soldier on. After painting her dress, gloves, purse and hat, here's the little cutie all clad in purple:
Okay, so, the purple dress is super cute but what if your client/mom/friend/sibling wants to see what it looks like in yellow? Instead of leaping off the nearest balcony, simply take a deep breath, grin smugly and do this:
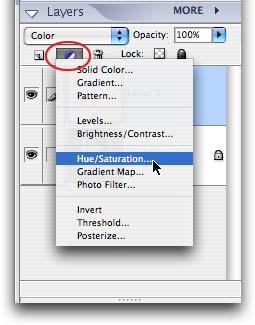
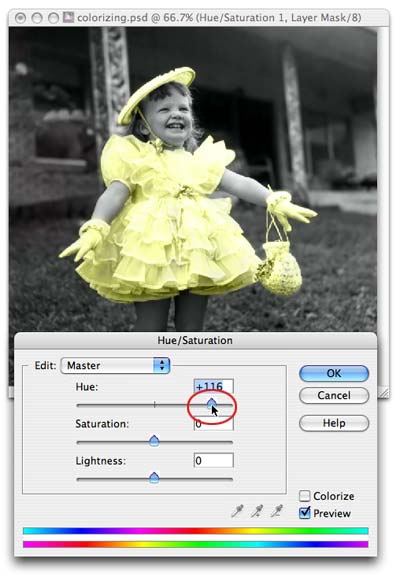
Step 7: Create an adjustment layer by pressing the half black/half white circle at the top of the Layers Palette (in Photoshop this button lives at the bottom of the Layers Palette), and choose Hue/Saturation as shown below.
Step 8: In the resulting dialog box, grab the Hue slider and move it rightward. See how the dress color changes as you go? Isn't that COOL?! YEAH baby!
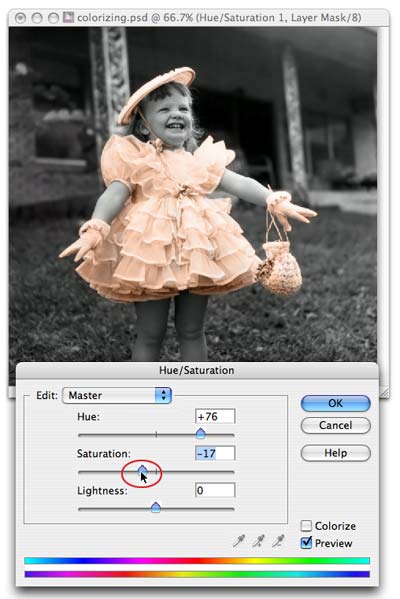
Step 9: In our case, I decided on a peachy color (it matches my web site) and to make the effect a bit more subtle, I decreased the Saturation just a tad, as shown below.
Tada! Think of how much fun you could have with this technique using a graphics tablet. And though we painted the color on with a brush, you could just as easily create a selection in myriad other ways. For example, if you're colorizing line art, you might use the Magic Wand to select areas of white between the black outlines which you'd then fill with color in one fell swoop. Myself, I'm not a fan of selection tools at all and prefer to use a brush whenever I have the chance.
And of course, the neatest thing of all with adding color in this manner is that you can change your mind a dozen times. Just double click the adjustment layer and the Hue/Saturation dialog box dutifully flings itself open, ready for the latest round of tweaking.
Until next time, happy colorizing!


PhotoLesa's photography gear provided by: