
PhotoLesa's photography gear provided by:


So the other day I get an email asking how to map the image of a circuit board onto a human face. An interesting though slightly unusual request, it's definitely not the oddest email I've ever gotten. Turns out, this is a really useful and easy technique and now that you know what to look for, you'll see it used in ad campaigns all across the country.
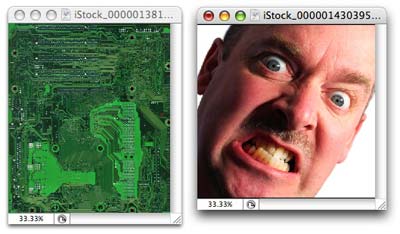
To illustrate the effect properly, I trotted over to istockphoto and purchased a photo of a circuit board and a face: a "Scary Frustrated Man Face" to be exact, just to spice things up a bit.
Here are the two images I snatched for a cool $2:
Make a selection
The first thing we need to do is to make a map of the face. To do this, we need to delve into Channels for just a minute. Don't be scared, we won't stay there long :)
Step 1: Pop open the Scary Frustrated Man Face.
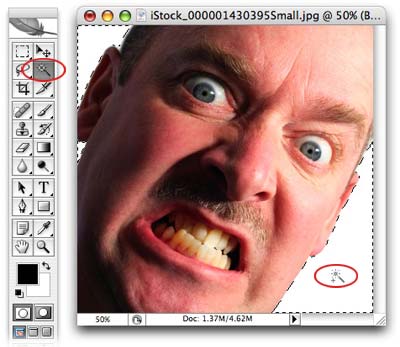
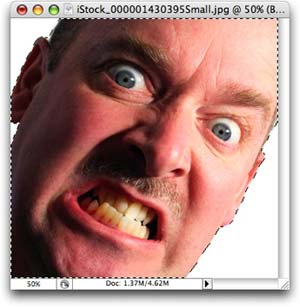
Step 2: Make a selection of the face area with the Lasso tool, the pen tool, or whatever works best. In this example, the face is on white background which makes our task very easy. Since the Magic Wand tool is made for selecting by color, I select it by pressing W. Click once within a white area, then Shift click to select the other white bits.
Step 3: Invert the selection by pressing Command + Shift + I (PC: Ctrl + Shift + I), or choose Select > Inverse, so that the face itself is selected.
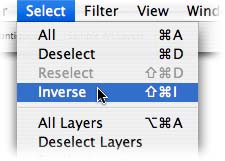
Now the ants are marching around the face:
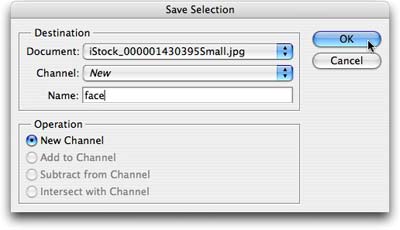
Step 4: Choose Selection > Save Selection. Enter "face" for the selection name and press OK. Press Command + D (PC: Ctrl + D) to get rid of the marching ants for the time being, we'll need them again later.
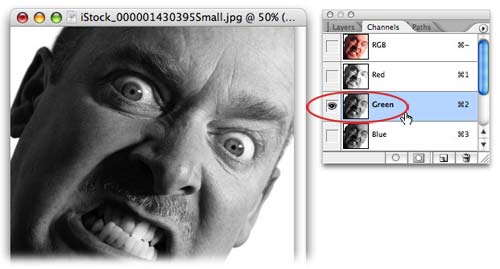
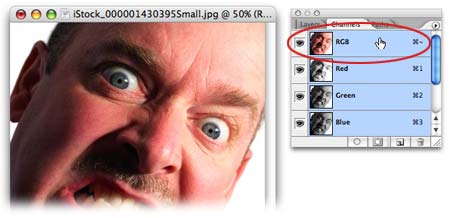
Step 5: To make the best map possible, we need to find the Channel with the greatest contrast. Cycle through the Channels by pressing Command + 1, 2, or 3. Just keep pressing these keys until you land on the channel you like the best. Below, I've chosen the Green channel.
Step 6: From the Channel fly-out menu, choose Duplicate Channel.
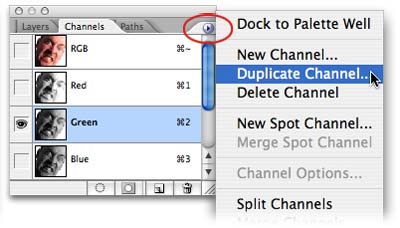
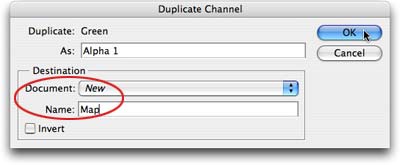
Step 7: In the resulting dialog box choose Destination > New and give it the name "Map". Click OK.
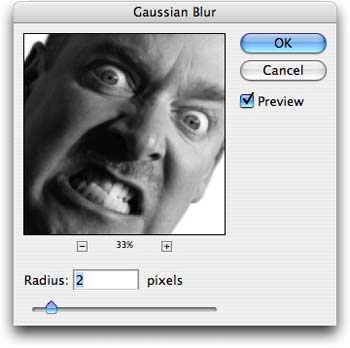
Step 8: The Map document should pop open automatically. Click the document to select it and choose Filter > Blur > Gaussian Blur. Enter anywhere from about 1-4 pixels (for lower resolution images enter 1, for higher, enter approx. 4) and click OK. The point is to blur the image just a bit so that the map is somewhat smooth.
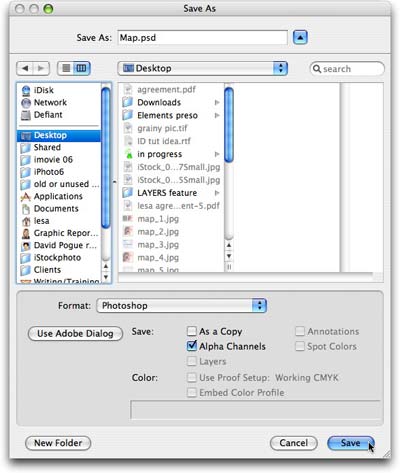
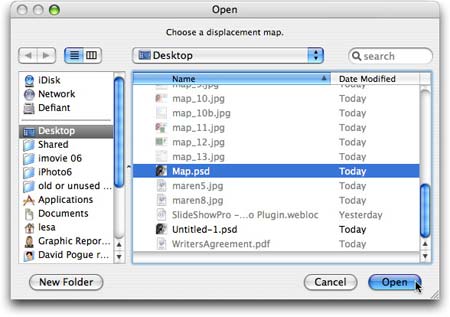
Step 9: Choose File > Save As and save the document as a native PSD document with the Alpha Channel box checked, as shown below:
Step 10: Go back to the original document (our Scary Frustrated Man Face) and press Command ~ (PC: Ctrl ~) to turn all the channels back on so that you see the full color image.
Step 11: Pop open the image you want to map onto the face, like this fine circuit board. Select the Move tool by pressing V and drag the circuit board onto the face document. Just drag the layer onto the face document as shown below:
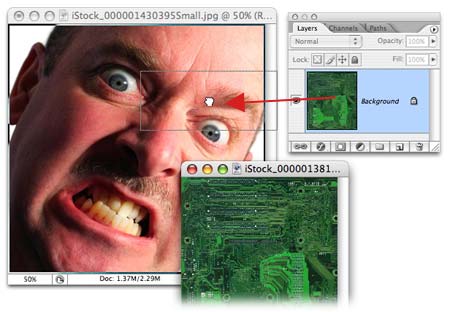
Now the circuit board is covering the man's face completely:

Step 12: Trot up to the Filter menu and choose Distort > Displace. In the resulting dialog box, just leave the settings at their default and click OK.
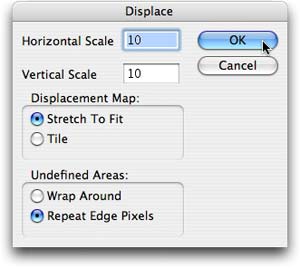
In the next dialog box, navigate to the Map document we saved a few moments ago. You'll see the circuit pattern "shift" to the contours of the face. Very slick.
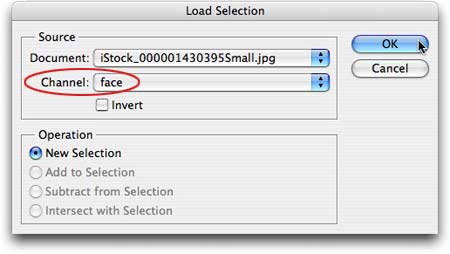
Step 13: Now it's time to bring back the face selection we created earlier. Choose Select > Load Selection > Face. You should now see marching ants appear around the face (which is behind the circuit board).
Step 14: Choose Select > Inverse so that everything except the face is selected. Feather the selection edges slightly by choosing Select > Feather. Enter a pixel value of about 2, and press OK.
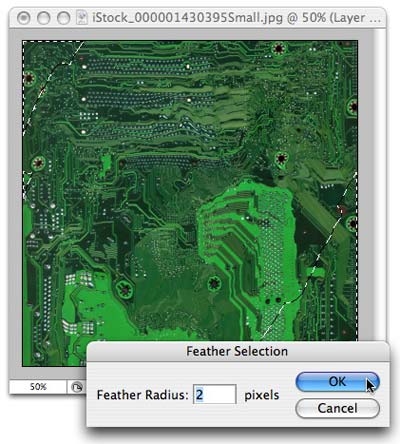
NOTE: Again, this number will depend upon the resolution of the images you're working with.
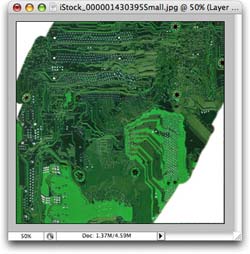
Step 15: Press Delete and the unwanted areas of the circuit board shall vanish, and press Command + D (PC: Ctrl + D) to get rid of the marching ants. This is what we have now:
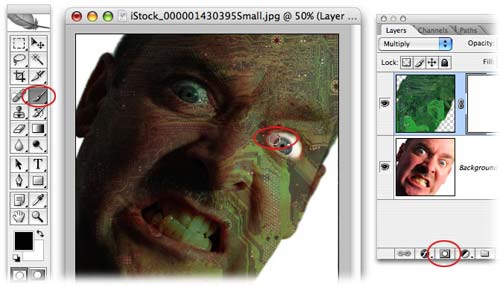
Step 16: Change the blend mode of the circuit board layer to Multiply, and lower its opacity.
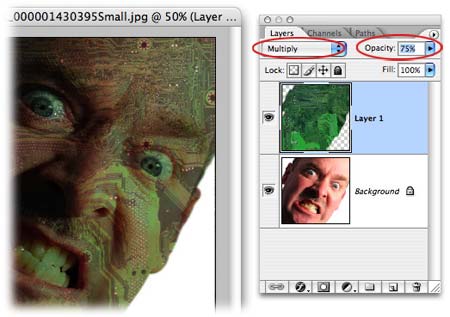
Step 17: Add a Layer Mask by clicking the circle within a square button at the bottom of the Layers Palette. Select the Brush tool by pressing B and with black as your foreground color chip, paint in the eye and teeth area, as shown below:
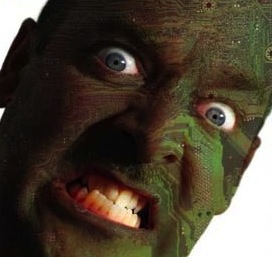
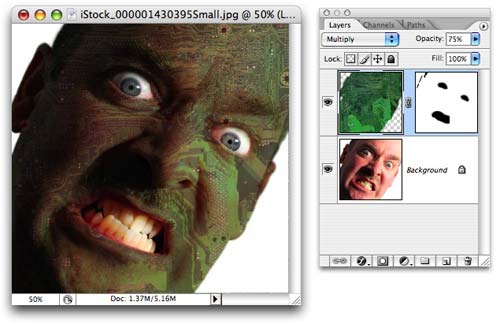
And voila! Here's our finished product, along with the Layers Palette showing the mask.
Whee! That was a fun tutorial; thanks to Imar for the idea :)


PhotoLesa's photography gear provided by: