
PhotoLesa's photography gear provided by:


Do you long for a change? Do you need to add some spice to your life? Feel the urge to throw caution to the wind and buy a sportbike? (LOL I actually did that!) Well, perhaps all you really need is to change you hair color. Really! if you're armed with Photoshop, you can try as many shades as you'd like with zero dollars spent on a fancy beauty salon computer to simulate your mane in alternate hues.
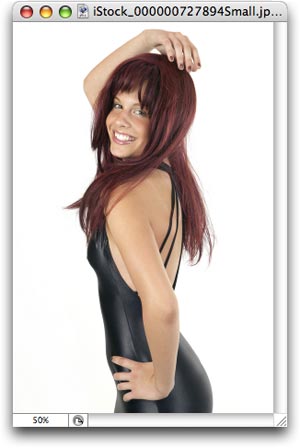
In all seriousness, if there ever comes a point in your Photoshop career when you want to change the color of something, a Hue/Saturation adjustment layer will become your new best friend. Today I'm going to show you how to use one to change the color of hair, *and* with the right type of photo (you on a white background) you won't have to use a single selection tool. And we'll do it all with this photo plucked from the depths of the vast database over at iStockphoto.com:
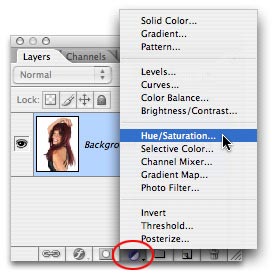
Step 1: Pop open a photo and create an adjustment layer by clicking the half black/half white circle at the bottom of your layers palette. Choose Hue/Saturation.
Step 2: Turn on Colorize at the bottom right of the resulting dialog box, and tweak the settings to produce a very bright, highly distasteful color. Click OK.
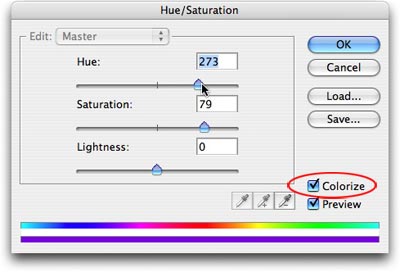
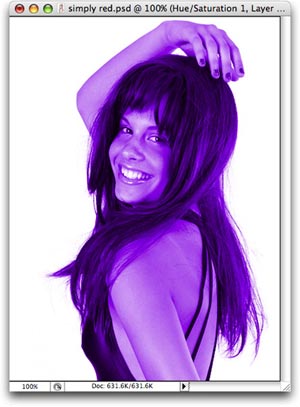
Don't panic; this awful color is going to help us fine tune a layer mask in a minute. Trust me. This is what my document looks like:
Whenever you create an adjustment layer, Photoshop automatically tacks a layer mask onto it. This is extremely helpful because a layer mask allows us to hide the effect of the adjustment layer in certain areas of the image. Painting with black directly onto a layer mask hides the effects of the adjustment layer, and painting with white reveals the effects. Oftentimes, it's easier to fill a layer mask completely with black (which hides the effect completely), and use the Brush tool to paint with white those areas you want the effect to show through. In our case, that's the hair.
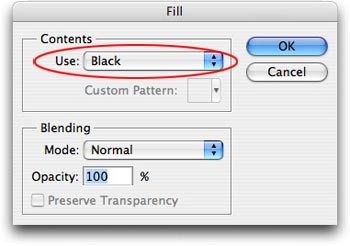
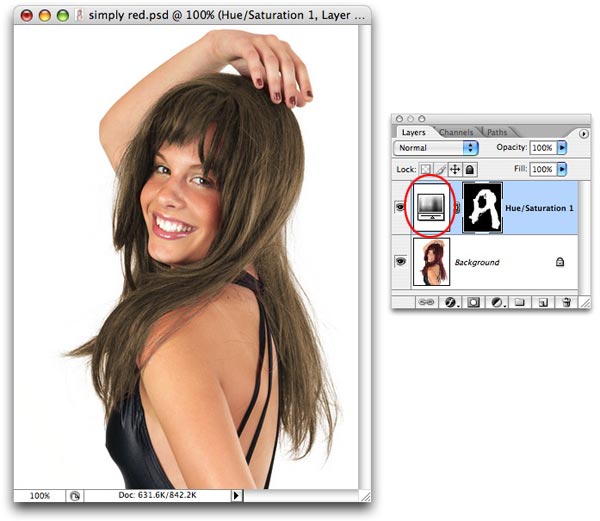
Step 3: With the layer mask of the Hue/Saturation adjustment selected (you'll see a tiny black border around it, as shown in the second screenshot down), choose Edit > Fill and choose Black from the Use pop-up menu. Click OK.
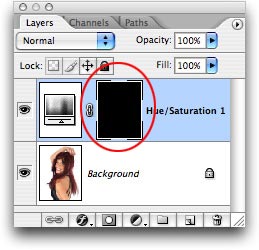
Your photo should look normal again, sans the wretched color we applied above in Step 2. This is what my layers palette looks like, with the layer mask circled in red:
Step 4: With the layer mask still selected, we're now going to paint her hair with white to allow our color change to show through just that area. Press D to set the color chips to default, and press X until white is on top. Select the Brush tool (just press B) and with a fairly large brush, begin to paint the hair.
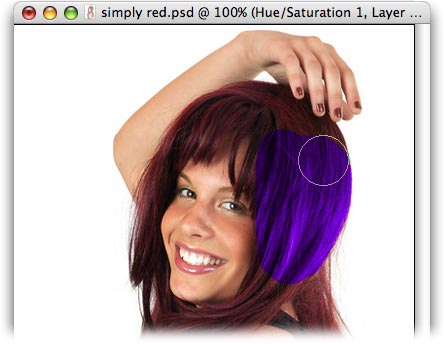
As you paint, you'll see the bright ugly color reappear. Stick with a large brush until you get the big chunks painted, then switch to a smaller size for the tiny strands. If you accidentally paint an area by mistake, press X to swap color chips and paint that area with black. You'll do lots of swapping between white and black during this technique.
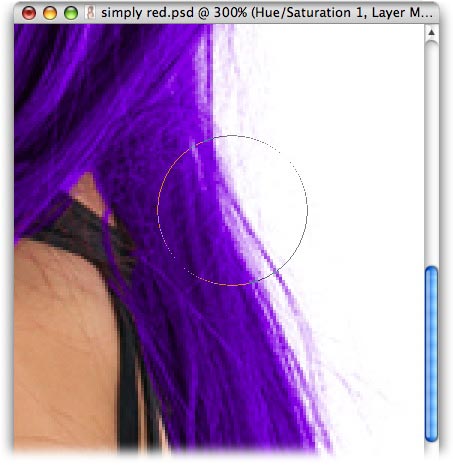
NOTE: Because this particular image is on a white background, I don't have to worry about the whispy hair strands around the outside edges, so I painted over them with a large brush, as shown below. However, I do have to be careful with the strands touching any part of her body.
TIP: You'll do lots of swapping brush sizes with this technique so here are a few helpful shortcuts: Cycle down in brush size by pressing the left bracket, [, cycle up by pressing the right bracket, ]. Zoom in and out of the document by pressing Command +/- (PC: Ctrl +/-). Move around within the document by pressing and holding the spacebar; the cursor will turn into a little hand.
Step 5: Double-click the Hue/Saturation icon in the adjustment layer (circled below in red) and tweak the settings until you find a more natural, less saturated hair color. NOTE: The less you tweak the Lightness slider, the more realistic the results will look.
To review, the Hue/Saturation adjustment is great for changing colors. Because we've used a Hue/Saturation adjustment layer, instead of choosing Hue/Saturation from the Image > Adjustment menu, we have an enormous amount of flexibility:
Until next time, have fun coloring hair!


PhotoLesa's photography gear provided by: