
PhotoLesa's photography gear provided by:


This past week while teaching at Photoshop World in Orlando, FL, I noticed one technique in particular that made audiences sit up and pay attention. It involves using a seldom-used set of brushes together with the Brush tool and painting the edges of a photo. It's a quick and easy way to give your photo a very creative edge. And because we'll use a layer mask to get it done, the technique is as non-destructive as could be.
Confession: Honestly, if you spend a little time with this technique you'll never again look longingly at those third party edge effect kits. The flexibility with this particular effect is just endless and the physical painting aspect is really quite fun. Let's get started!
Step 1: Open an image and double-click the Background layer to make it editable.
Step 2: Create a new layer below the one currently selected by Command (PC: Ctrl) clicking the new layer icon at the bottom of the Layers palette.
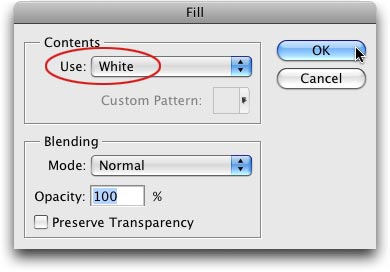
Step 3: To fill the layer with white, proceed immediately to the Edit menu and choose Fill. Pick White from the Use menu and press OK.
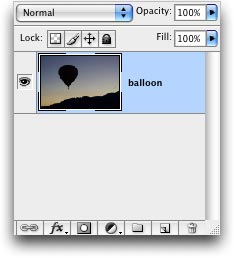
This is what your Layers palette should look like now:

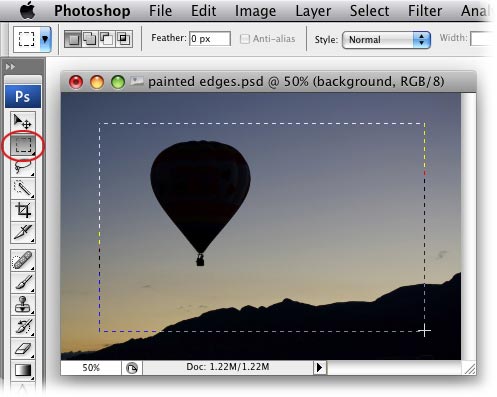
Step 4: Press M to grab the Rectangular Marquee selection tool and draw a box around the image, about 1/4 way into the image.
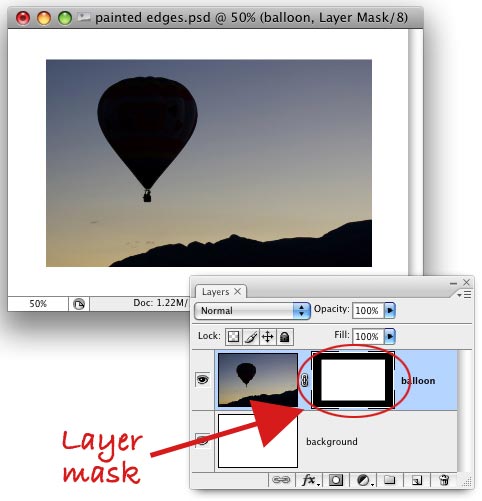
Step 5: Over in the Layers palette, click once on the photo layer then click the circle within a square icon to create layer mask.
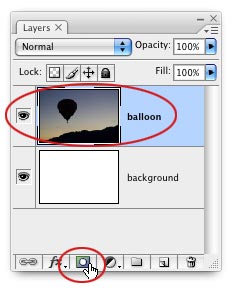
Notice how the edges of the photo are hidden? In the next step we'll paint edges back in using a rather unique brush.
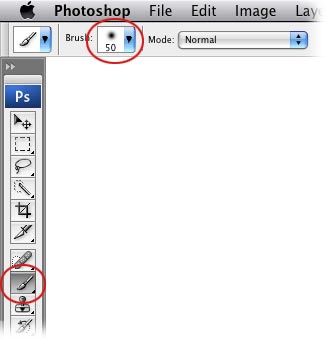
Step 6: Press B to grab the Brush tool then trot up to the Options bar at the top of your screen and click the downward pointing triangle to open the Brushes palette (circled in red below).
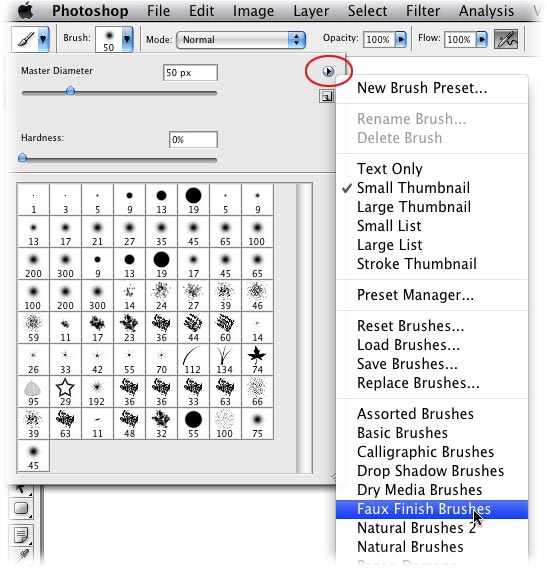
Step 7: Open the fly-out menu by clicking the triangle at the upper right corner and choose Faux Finish Brushes from the resulting menu.
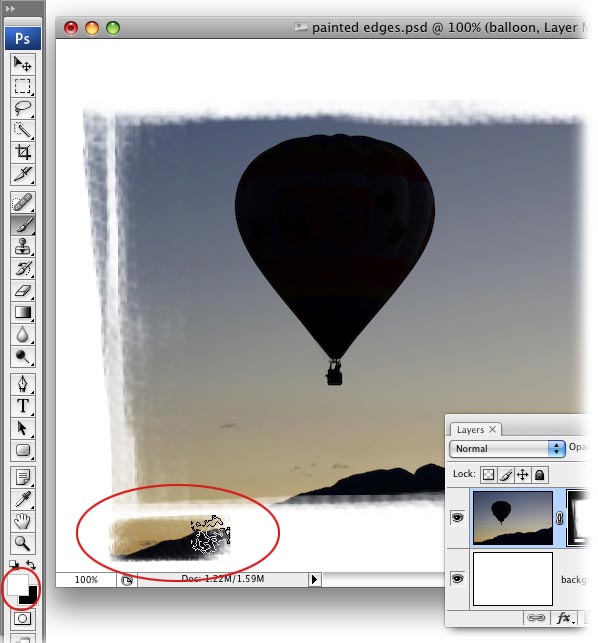
Step 8: Take a peek at the color chips at the bottom of the main Tools palette and press X until black hops on top. Then press the right bracket to cycle up in brush size, ], and with the layer mask selected (circled below in red) begin to brush over the edges of your photo, like so:

Step 9: If you want to brush some of the photo back in, press X to swap color chips so that white is on top. You'll do a lot of color chip swapping in order to get the effect below:
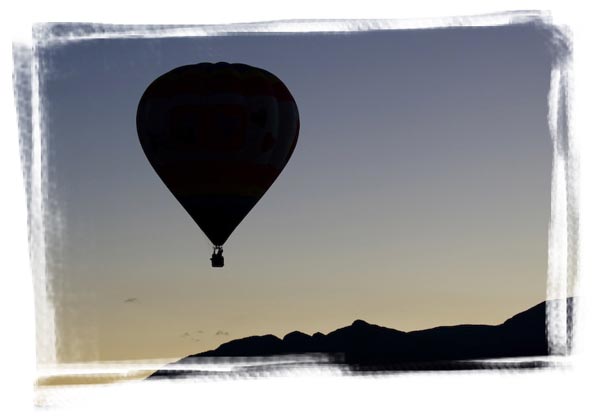
And here's the finished product:
That's all there is to it! I hope you enjoy this little creative edge fix :)


PhotoLesa's photography gear provided by: