
PhotoLesa's photography gear provided by:


Alas, it’s true that there’s no magic fixer-upper that can take an out-of-focus image and make it look like it’s really in focus. That is, except for the Emboss filter. Technically it’s not really fixing the image and making it sharp, it’s merely bringing out the edges that are already there, which makes the photo look sharper than it really is.
You don’t want to do this on professional images that you sell, of course, but if you’ve got one in your personal collection that needs saving, here’s how to do get it done:
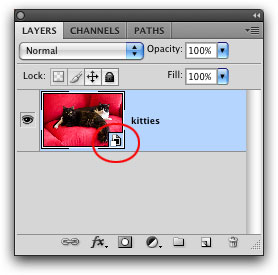
Step 1: Open the offending image and choose Filter > Convert for Smart Filters. This step makes the filter run on its very own layer, and lets you fiddle with filter blending options and opacity. As soon as you select the menu item, Photoshop slaps the Smart Object badge of honor (circled below) onto that particular layer, plus it’ll also unlock it if it’s a Background layer.
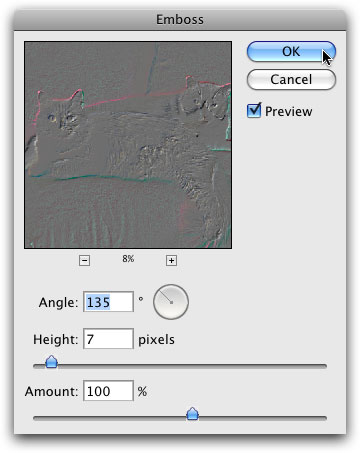
Step 2: Choose Filter > Stylize > Emboss. In the resulting dialog, leave the angle, height, and amount settings as they are—that’s right, don’t touch ‘em. Your image will look gray and the edges of your subject will be brightly colored (as shown below), but that’s exactly what you want. In the next couple of steps you’ll use a blend mode change to make the gray bits disappear. TIP: To make sure the Emboss filter dialog settings are truly the default settings, press Option (Alt on a PC) and the Cancel button will change to Reset.
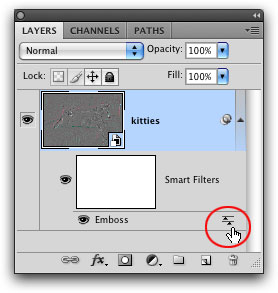
Step 3: Open the Blending Options for the Emboss filter. Over in your Layers panel, double-click the tiny icon to the right of the Emboss layer (it looks like two arrows and is circled below).
Step 4: In the resulting dialog, change the blend mode pop-up menu to Hard Light, leave Opacity at 100%, and click OK.
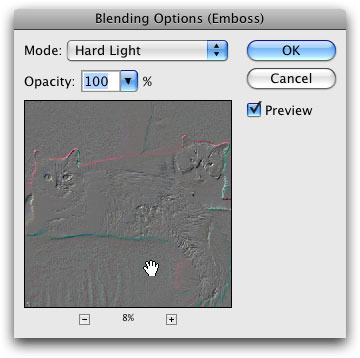
The blend modes in the Overlay category add contrast to your image and they just so happen to ignore the color gray. Since the Emboss filter turned your image gray and gave it brightly colored edges, this blend mode change makes the gray bit vanish leaving only the edges visible. This makes them stand out more and appear sharper than they really are.
If you introduce a weird color effect around some of the edges (notice light red around Sylvester’s ears on the right side), you can always hide that part by clicking on the Smart Filter’s mask (the white thumbnail you see above the filter name in your Layers panel), grabbing the Brush tool and then painting that area of the photo with black.
Here’s the before and after:
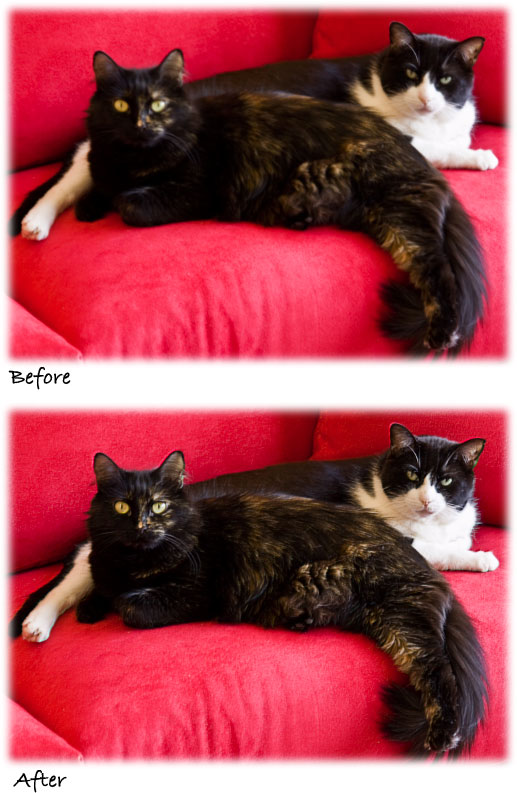
That’s all there is to it! Well, aside from grinning really big because you fixed your image (Samantha and Sylvester said to tell you hi, by the way).
Until next time, may the photo-fixing force be with you!


PhotoLesa's photography gear provided by: