
PhotoLesa's photography gear provided by:


I’ve been chief evangelist of iStockphoto.com for a couple of years now, though only last fall did I become an actual contributor to the stock library. My photography skills are really coming along and it’s thrilling when someone purchases one of my images (plus I get a kickback). The problem, however, is that it’s extremely frustrating/discouraging/heartbreaking to have a well-composed image rejected, especially for a problem I could have fixed before submitting.
Case in point: I participated in a real photo shoot in Calgary last year—models, wardrobe, make-up artists, the whole nine yards—and captured what I considered to be an excellent stock shot:

“...charge migration (bloom) on the CCD.”
“...typical of achromatic lenses, and often seen of digital cameras with very small pixels and high pixel counts.”
“...a common lens artifact, especially at the ends of cheap wide-range zooms close to wide open...”
Right. Not a single word of that makes sense to me. Luckily, a contributor by the name of Brian Lever over at iStockphoto.com shared a solution with me. (Disclaimer: I’m not saying Brian is the inventor of this method, but since he passed it along to me, he gets the credit.)
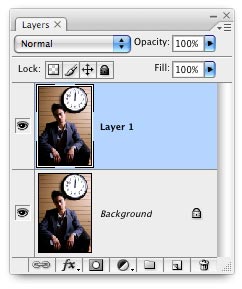
Step 1: Open the offending image and immediately duplicate the background by pressing Command + J (PC: Ctrl + J). This is purely a self-protection step; if all goes well you won’t need the original layer (though it’s good to keep around for a quick before/after view).
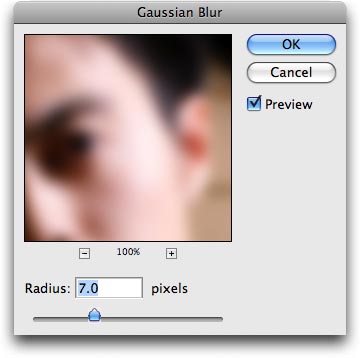
Step 2: With the duplicate layer selected, choose Filter > Blur > Gaussian Blur. Depending upon the pixel dimensions of the image you’re working with, enter a value of 5+ and press OK (you may need to experiment with this value).
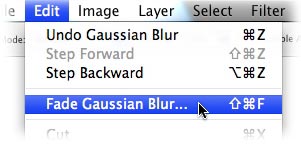
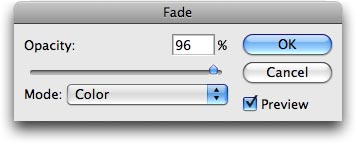
Step 3: Immediately choose Edit > Fade Gaussian Blur. NOTE: This option is only available right after running a filter; if you do anything else first the option will be grayed out.
Step 4: Enter 96% for Opacity and from the Mode pop-up menu, choose Color. Press OK.
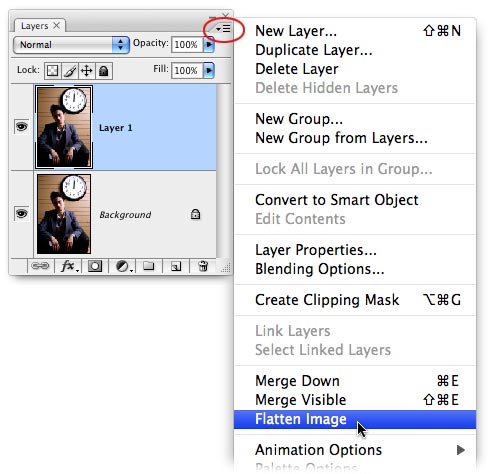
Step 5: From the Layers palette fly-out menu, choose Flatten image.
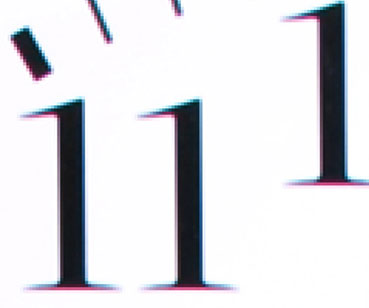
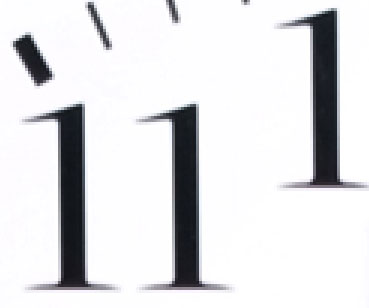
A quick zoom-in to the same percentage used in the earlier screenshot reveals that the evil color fringing is gone:
Needless to say, I’ve resubmitted the image to iStockphoto.com now that I’ve fixed the fringing problem. Keep your fingers crossed for me that it gets into the database.
See you next week!


PhotoLesa's photography gear provided by: