
PhotoLesa's photography gear provided by:


Welcome to the second installment of the Photoshop Missing Manual teaser series. This week's chapter was all about the Crop tool, and so is this week's tip. Enjoy!
There’s a reason professional photos look so darn good. Besides the fancy camera, expensive lenses, titanium tripod, artificial lighting, and post-processing voodoo, they’re composed and/or cropped extremely well. Cropping is a means of eliminating distracting elements by repositioning the subject. Good crops accentuate the subject, drawing the viewer’s eye; and bad crops, well, are just bad.
If you're shooting without a tripod, straightening is equally important (though it's really just a rotated crop, which you can do manually by hovering outside the corner of any crop box edge).
Today we'll talk about both cropping and straightening and how Photoshop and Elements can help you get it done on a slew of photos at one time.
There are two rather large advantages to using the Camera Raw plug-in for cropping and straightening.
Step 1: Open several images into Camera Raw by selecting them in Bridge or elsewhere on your hard drive.
Step 2: When the thumbnails appear in the filmstrip on the left side, press the Select All button.
Step 3: Grab the Crop tool and draw a box around the portions of the image you want to keep. Each thumbnail will be updated in the filmstrip with the crop, and a tiny Crop tool icon will appear at the bottom left of each thumbnail.
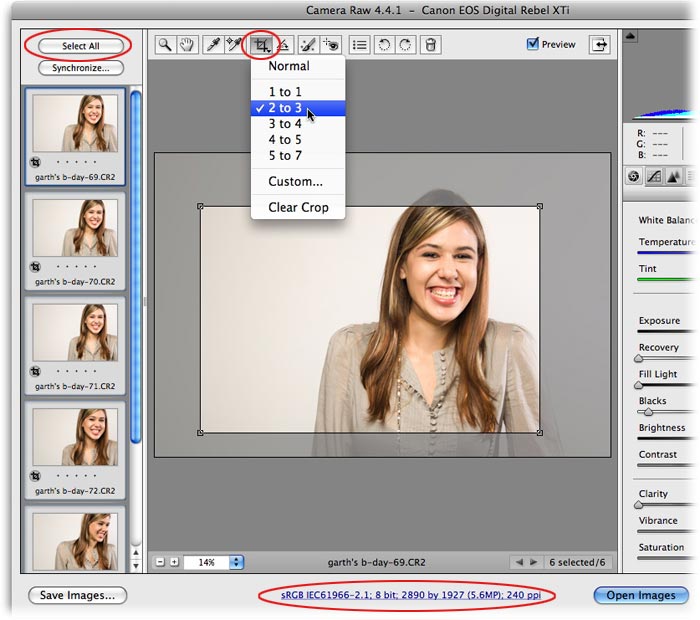
TIP: The size of the resulting crop is shown beneath the preview area as tiny blue underlined text, as you’re drawing it. This allows you to see exactly what size the crop will be.
Camera Raw doesn’t have an automatic straightener like Photoshop, though you can straighten a single image. Grab the Straighten tool (it lives to the right of the Crop tool) and draw a line across the horizon of the image, as shown below.
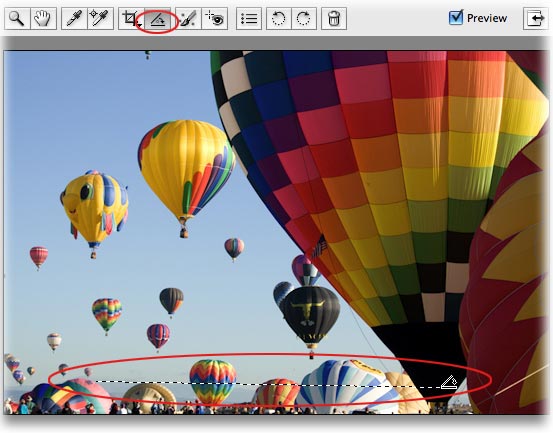 The image won’t rotate until you open it in Photoshop, but you get the next best thing: a rotated crop box like the one below. To edit, just open the image in Camera Raw and choose the Straighten tool again.

If you’ve scanned a slew of photos and they turned out crooked, both Photoshop and Elements will crop, straighten, and split them into separate documents for you—all with the flick of a single menu command.
In Photoshop
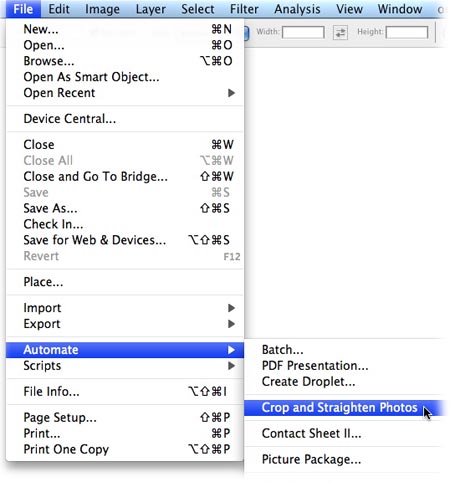
With the offending page-o-photos open, choose File>Automate>Crop and Straighten Photos.
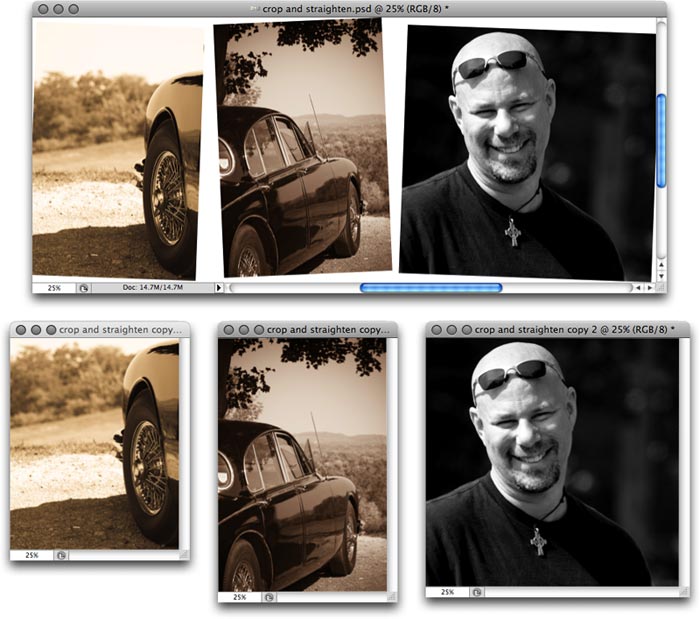
 Photoshop instantly duplicates all photos into their own perfectly cropped and straightened documents, as shown below.
TIP: This command will work on a single document, provided it has white edges on all four sides.
If you don’t want Photoshop to crop and straighten every photo in the document, draw a selection around the photos you want affected. Use any selection tool and hold the Shift key to add to the selection and then run the command. Photoshop will process only those photos, provided the selections are next to each other. If they’re not, Photoshop will crop and straighten everything in between.
In Elements
Elements will also crop and straighten, though only on one photo. It also doesn't split photos out into their own documents.
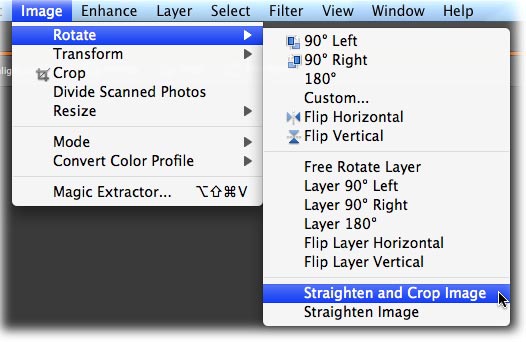
Nevertheless, open the offending photo and choose Image > Rotate > Crop and Straighten or just Straighten, depending upon what you want to do.
That's all for this week! Until next time, happy cropping!


PhotoLesa's photography gear provided by: