
PhotoLesa's photography gear provided by:


It's that time of year yet again! Time to stress about shopping and money and what to cook and what to wear and of course, finding/mailing holiday greeting cards. Luckily, affordable stock imagery makes creating your own cards a snap.
However, the first thing you should do is choose the greeting card paper you'll use. This way you can set up your Element document correctly in the beginning to make sure everything fits. There are many resources for paper and I suggest doing a Google search for "inkjet greeting cards". I found everything from Avery to specific printer brands at fairly affordable prices.
Step 1: Pop open Elements and choose File > New document. Choose inches from the pop-up menu shown below (circled in red). If the paper I purchased is 6 x 4 inches, and I happen to know that my printer does well at 200 dpi, those are the numbers I enter into the dialog (yours may vary). Press OK when finished.

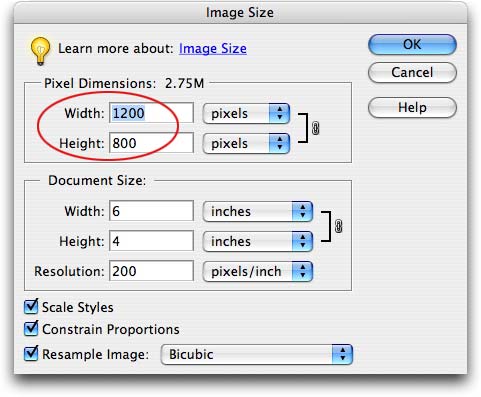
Step 2: Once the document pops up, choose Image > Resize > Image Size. Take a peek at the pixel dimensions of your new document and make note of them. We'll use those numbers when we go hunting for stock imagery for the card.
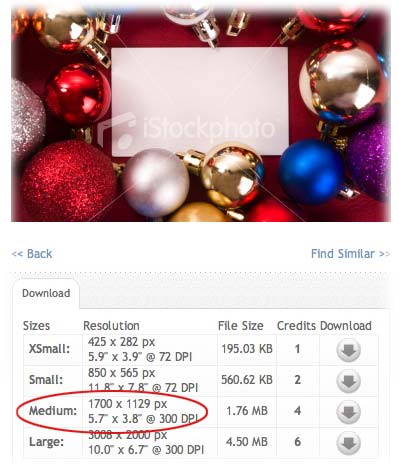
Step 3: Hop on over to iStockphoto and locate the "Seasonal Search" ad on the left side of the home page (after you log in). It's shown below:


Step 4: Once the image has downloaded, choose File > Place and navigate to where the document lives (most likely that'll be your Desktop).

Step 5: When the image shows up in your document it'll probably be centered. Just move it to the top left of the document, and while holding the Shift key, drag the lower right handle outward so that the card fills the document.

Step 6: Open the family photo you'd like to use and press Command + A to select all (PC: Ctrl + A). You should see marching ants surround the image, as shown below. Copy the image to your clipboard by pressing Command + C (PC: Ctrl + C).

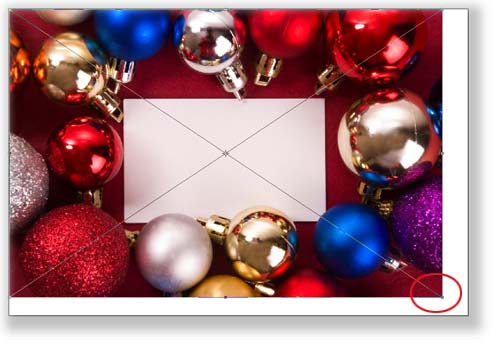
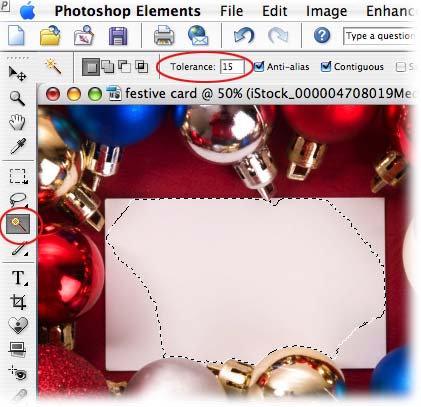
Step 7: The stock image I picked has a nice white card in the center. If I create a selection of that area, I can pop the family photo into it. To do this, grab the Magic Wand tool by pressing W then lower the Tolerance in the options bar (circled in red below). A lower number means Elements will be pickier with the pixels it selects and a higher number means it'll select more pixels. Play around with it and while holding the Shift key, keep clicking with the Magic Wand until you get the entire card area selected (it took me about 8 clicks).

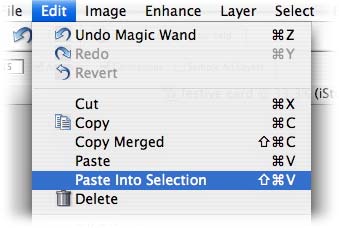
Step 8: Instead of just pasting in the family photo, we'll choose Edit > Paste Into Selection. This will force the image into the selected area.

Step 9: If the photo needs to be resized, just press Command + T (PC: Ctrl + T) to invoke Free Transform. Grab a corner handle and while holding the Shift key, drag inward to decrease the size of the photo. Click and hold in the center of the image to move the photo around within the little frame area. Press Return when finished to accept the transform.

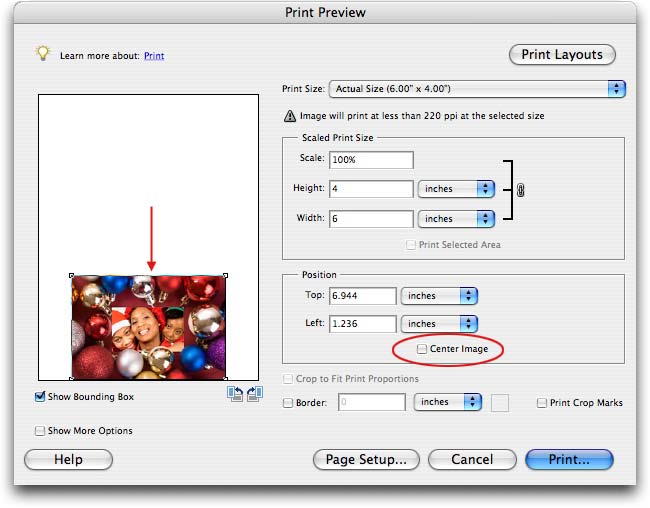
Step 10: When you get it just right and are ready to print, load the paper into your printer and press Command + P (PC: Ctrl + P). Uncheck the Center Image box (shown below) and use your mouse to physically move the photo (in the preview area) to the bottom of the page. This will make the photo print on the lower quadrant of paper so that it folds properly. Press Print when finished.
Step 11: Over in the Layers Palette, uncheck the visibility eyeball of the photo and grab the Text Tool to create some type (just press T). Use the Options bar at the top of your screen to pick a font, size, and color.

Step 12: Turn the paper over and reload your printer with it yet again. Print the document so that the text prints at the bottom of the page, just like we did earlier.
When you're finished, you should have something that looks a little like this:

Combining stock art and your own photos is a great way to personalize your cards. There's just so many possibilities! Until next week, happy card creating :)


PhotoLesa's photography gear provided by: