
PhotoLesa's photography gear provided by:


 Adobe Photoshop Elements is an incredibly powerful piece of image manipulation software, but it's missing a very powerful feature found in Photoshop called Layer Masks. Luckily, there's a built-in way we can trick Elements into thinking it has this capability. But first, let's talk a little bit more about Layer Masks in general...
A Layer Mask is a method of hiding pixels. In my humble opinion, once you make a selection, you never want to actually delete those pixels. Instead, what you want to do is to mask them off. As an analogy, think of a Layer Mask as if it were the masking tape you’d place around the window trim when painting your walls.
Using the analogy of painting your home above... rather than remove the window trim completely (yikes), wouldn’t you rather protect it with masking tape so you can do whatever you want with the walls? Of course you would. The same logic applies to your images. When you want to mess with certain portions of the image, rather than delete the unwanted bits, consider masking them off instead. This way you don’t destroy your original image, and your artwork remains flexible and you can experiment with different effects and such.
In Photoshop, there's a Layer Mask button right in the Layers Palette. No such luck with Elements. So, what we're going to do is use the Group with Previous command instead which will hide our photo completely, then paint on a mask on another layer below it.
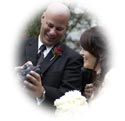
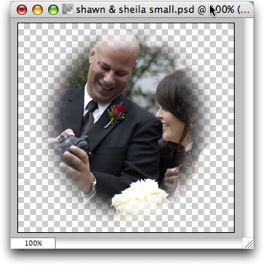
In this example let's to take an image and make it into a nice, soft, romantic vignette.
Step 1: Open the image and make sure the Background Layer is editable (just double click on it and give it a name)
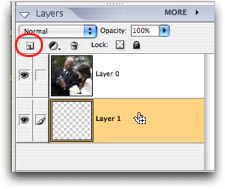
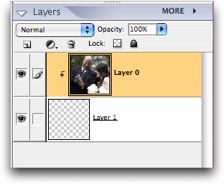
Step 2: Add a layer below your photo by clicking the little icon at the top left of the Layers Palette (circled in red below). Drag this new layer underneath your image. It must be on bottom for this trick to work!
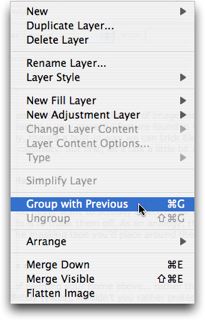
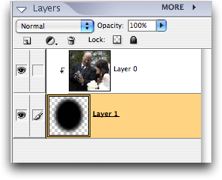
Step 3: Click back on your image layer, and from the Layers menu at the top of your screen, choose Group with Previous (Mac: Command G, PC: Control G). Your Layers Palette should now look like this:
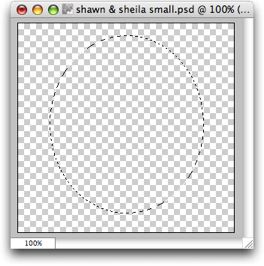
Step 4: Back in the Layers Palette, select the blank layer on the bottom, and use the Elliptical Marquee selection tool to make a nice oval set of marching ants. This is going to be the shape of our mask. Keep reading :)
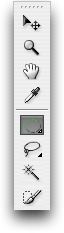
TIP: Holding down the Option key (PC: ALT) allows you to draw from the center outward. Holding down Shift key constrains your selection to a perfect circle. Holding down both keys, well, does both!
Step 5: Let's make the edges nice and soft by feathering them. Choose Selection > Feather and enter 10 pixels. Press OK.
Step 6: Now let's fill our selection with a color (any color). In our case, I used black on top. Choose Edit > Fill Selection, or simply press Option Delete (PC: ALT Delete). Your Layers Palette should look like this:

NOTE: It makes *no* difference which color you choose because we're making a Clipping Group, which means Elements is going to let our photo show through whatever *shape* we create, whether it's the shape of letters (as in type), a square, circle, a big curvy blob, etc.
Now you can press Command D (PC: Control D) to get rid of the marching selection ants, add a layer filled with another color below the mask layer, or what have you. Here the transparency blocks are showing through:
Spend some time experimenting with this little trick and I believe you'll come to appreciate its power. Have fun!


PhotoLesa's photography gear provided by: