
PhotoLesa's photography gear provided by:


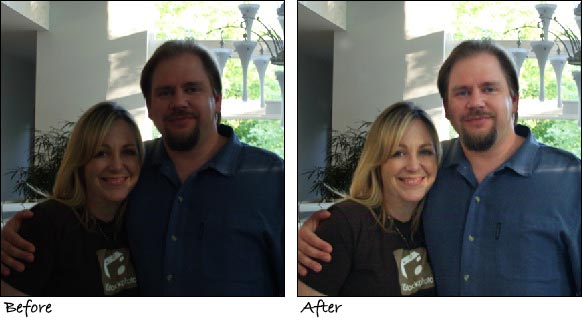
Ever forget to use fill flash? Ever encounter an area where flash photography is prohibited? Ever taken a picture of people against a super bright background? If you answered yes to any of these questions, you've probably ended up with a photo like the one at left; a photo with serious lighting issues.
Fixing such a photo is super easy if you know the trick. NOTE: If you're one of the lucky folks who own Photoshop CS1 and latter, you have a built-in fixer-upper called the Shadows/Highlights adjustment. (The same command also lives within Elements 3 and latter, though it's kind of hidden: Choose Enhance > Adjust Lighting > Shadows/Highlights).
However, the technique I'll show you today uses a different blend mode along with a layer mask, thus giving you complete control over which areas are lightened. Depending upon your photo, this technique can yield superior results over the one-step method mentioned above. Let's get started!
By the way, that's me above with my good friend and Photoshop master Ben Willmore, at the home of Thomas Knoll--also known as The House that Photoshop Built.
Step 1: Open the offending photo and duplicate the layer by pressing Command + J (PC: Ctrl + J).
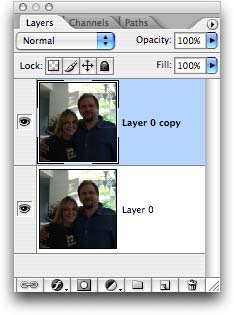
TIP: To remember this keyboard shortcut, imagine Photoshop is "jumping" a selection up onto its own layer. If nothing is selected (rather, you have no marching ants), then the entire layer gets duplicated. Simple enough.
Step 2: With the duplicated layer selected in the Layers Palette, change its blend mode to Screen as shown below. This will lighten the entire photo. In some cases this may be satisfactory, but alas, not today.
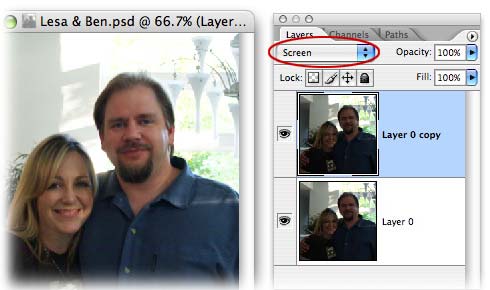
To fix the areas of the photo which are now too light, like the background, we'll hide bits of the duplicated layer thereby hiding the screen effect we just applied. The way to hide pixels is by using a layer mask, and--as I've said a gazllion times--in the realm of the layer mask, black hides and white reveals.
Step 3: Click the circle within a square icon at the bottom of the Layers Palette to create a layer mask.
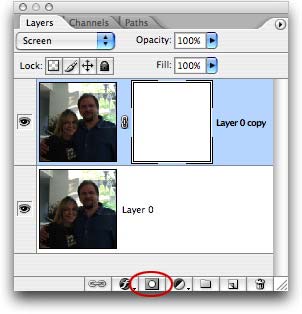
TIP: Option click (PC: Alt click) the layer mask icon to create a mask filled with black. This is helpful if the area you wish to lighten is smaller than the background.
Step 4: Press B to select the Brush tool and take a peek at the main toolbox to make sure the top color chip is black. If it's not, just press D to set the color chips to the default of black and white and press X until black lands on top.
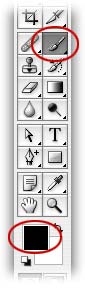
Step 5: Up in the options bar, choose a nice soft brush (one that looks fuzzy instead of hard--a soft brush will help the light and dark areas blend more smoothly). Being to paint the over-lightened areas.

TIP: If you mess up and paint an area that needs to be lightened, just press X to swap color chips so that white is on top and paint over your mistake. Press X once again to switch back to black and continue hiding the over-lightened areas.
After I finished painting the background area, this is what the photo and mask (circled below in red) look like:
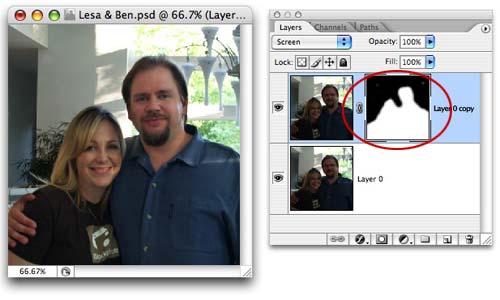
We're looking pretty good, but Ben and I could stand to be just a tad lighter.
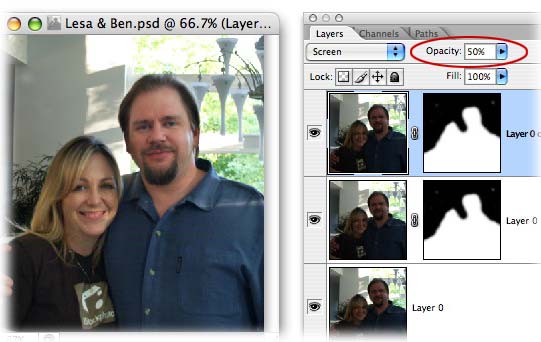
Step 6: Press Command + J (PC: Ctrl + J) to duplicate the lightened layer. The photo will brighten up even more. However, if it gets too bright, just lower the opacity of the duplicated layer, like so:
That's all there is to lightening folks! By duplicating our original layer and then using a layer mask, we've harmed nary a pixel. If you don't like the results, just trash the duplicate layers and begin again.


PhotoLesa's photography gear provided by: