
PhotoLesa's photography gear provided by:


Summer's almost over and hopefully you all crept out of your bat caves and into the great outdoors for some quality flower shooting. A nice idea for “flowerly” photos is to have a single element in focus, and the background softly blurred. In the world of photography, this technique is called a shallow depth of field, and it’s easy to attain with a digital SLR (a single-lens reflex camera, usually having interchangeable lenses). But what if you don’t have such a fancy camera? Never fear, for Photoshop is here! In this tutorial, I’m going to show you how to easily create the same effect after the photo has been snapped.
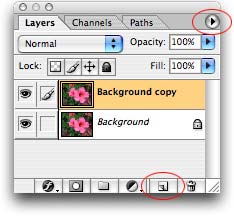
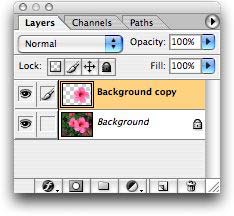
Step 1: Open the image and duplicate the Background Layer by dragging it onto the New Layer icon at the bottom right of the Layers Palette, circled in red below (you can also select the Background layer, and click the small triangle at the top right of the Layers Palette, also circled in red below, and choose Duplicate Layer).
Spend a moment gazing upon your image and decide what you want to remain in focus; that’s what we want to make a selection of. In our case, it’s “the foremost Hibiscus bloom. Though there are myriad ways to make selections, we’re going to use the Extract filter in Photoshop CS.
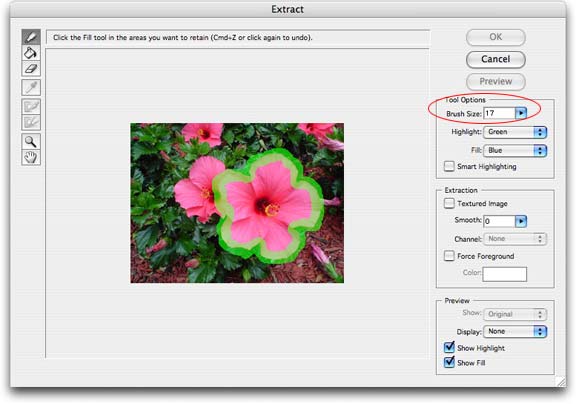
Step 2: From the Filter menu, select Extract. The idea is to use a brush to mark the edges of what we want to knock out (or remove). Under Tool Options of the Extract dialog box (circled in red below), you can adjust brush size, though I’m going to choose a smaller brush by tapping on the left bracket key, [ (likewise, you can choose a larger brush by tapping on the right bracket key, ]). I settled on a size 17 brush, and casually drew the following green border around my flower.
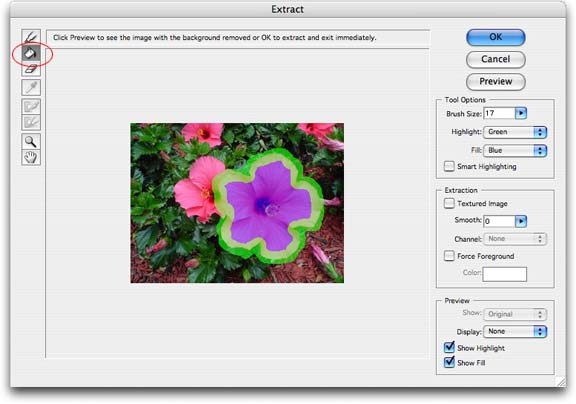
Step 3: Next, click the Paint Bucket tool at the top left of the Extract dialog box. This tells Photoshop what we want to keep. I clicked once within the center area of our bloom and it turned purple, then I clicked OK.
Step 4: Back in the Layers Palette, you’ll notice that the duplicated layer now contains only the one bloom.
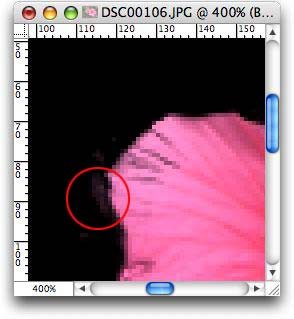
I’m going to zoom in by pressing Command + (or Control + on a PC) and see if there are any edge artifacts that I need to zap before going further. Indeed there are, so I’m going to get rid of them with the Eraser tool. TIP: I created a new layer directly underneath the single bloom layer, and filled it with black in order to more easily find bits that need erasing. When finished, just toss that extra layer or turn it off by clicking the little eyeball icon in the Layers Palette).
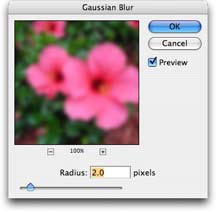
Step 5: Select the original Background layer (the one with the full image), and double-click it to make it editable (if it isn’t already). From the Filter menu, choose Blur > Gaussian Blur. Use the slider bar or enter an amount of “blurryness” and click OK. In this case, 2.0 did the trick.
Voila! That’s all there is to it. See what a difference it made in our photo below:
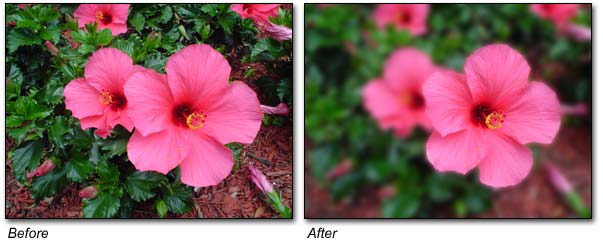
There are some other things we could do such as softening the edges of our bloom in order to blend into the background a little better, though overall our image looks very nice with these five, super easy steps. Until next time, get outside and start shooting!


PhotoLesa's photography gear provided by: