
PhotoLesa's photography gear provided by:


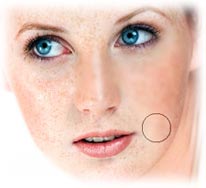 An important thing to remember when retouching photos is to exercise a little restraint. You probably don't want to retouch a subject so much that they cease to resemble themselves. Take this photo of a beautifully freckled woman. If we remove her freckles completely, it wouldn't look like her.
Softening her skin, thereby lessening the intensity of her freckles, is what we really want to do. Sound hard? It's really not. Like most things, there's a trick to it.
Ladies and gentlemen, watch closely now as I perform selective blurring. Behold it's magic!
Get your blur on!
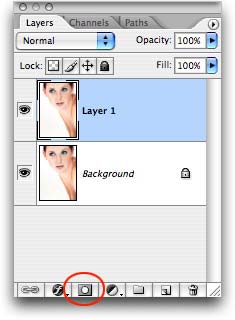
Step 1: Press Command + J (PC: Ctrl + J) to duplicate the background layer. The wisdom of this shall be revealed at the end of the tutorial.
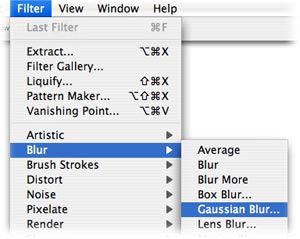
Step 2: Choose Filter > Blur > Guassian Blur. Adjust the Radius slider until you get a pretty good blur going on. Don't worry if you start to lose detail; we'll fix that in a minute.
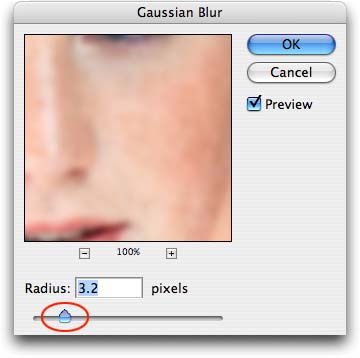
TIP: If you click and hold within the preview window in the Guassian Blur dialog box, you can see a before and after shot. You can also move the image around within the preview window.
Now the entire image is blurry, and that's not what you want. To fix this, use a layer mask to allow only certain bits of the blurry layer to be visible.
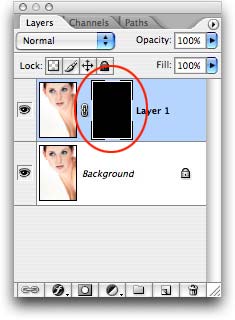
Step 4: Fill the layer mask with black. Press D to ensure that your color chips are set to default (black and white), and press X to swap them out until black rests haughtily on top. Press Option + Delete to fill the mask with black (PC: Alt + Delete). (You can also choose Edit > Fill with black if keyboard shortcuts aren't your cup-o-tea.)
You should notice now that the blurry layer is hidden completely. Remember, anytime you use a mask, black hides and white reveals. Burn this into your brain, dear grasshoppers! This is what my layers palette looks like now:
Step 5: With a fairly large, soft-edged brush, paint with white those areas of skin you want to soften, such as the freckly bits. Just press B to select the Brush tool, and press X to swap out your color chips so that white sits on top.
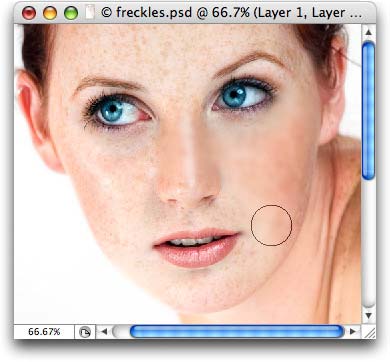
Don't worry if you accidentally blur something by mistake, like an eyebrow. Just press X to swap color chips again -- so that black is on top -- and paint the eyebrow blurriness away.
TIP: Press the left bracket key, [, to cycle down in brush size, and the right bracket key, ], to cycle up.
Step 6: When the mask is complete, lower the opacity of the blurry layer, until the effect looks real. TIP: If you hover over the word "opacity" in the layers palette, your cursor turns into a scrub brush, as shown below. Some folks find that easier to use than the boring old slider bar.
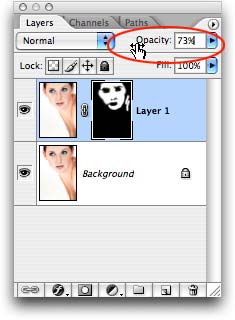
Do you see the beauty of duplicating the background layer first now? We protected the original photo from ourselves, *and* built in the ability to use layer opacity to get just the right effect.
Here's our before and after:
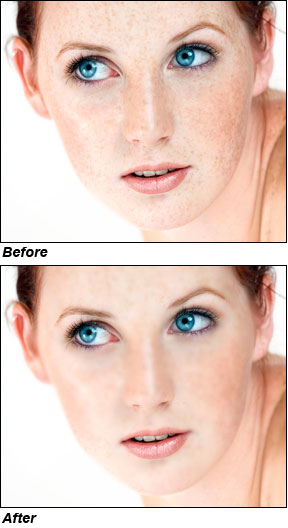
This is a great technique to use anytime you want to soften the skin for a more romantic look and feel.


PhotoLesa's photography gear provided by: