
PhotoLesa's photography gear provided by:


To JPEG, to GIF, to PNG... that is the question. Each time we create a web graphic, we engage in the "quality vs. file size" dance. To make nice and tidy, quick-loading web graphics, they need to be small in file size; however, making them small in file size reduces quality.
The trick lies in knowing which file format to use when to give you the best quality, and knowing a few tricks about each format to squeeze them down to size.
NOTE: To save thyself from thyself, it's a good idea to save your original image as a native Photoshop or Elements document (.psd file). This way, each time you open it and tweak it you're not losing quality (saving a JPEG as a JPEG will recompress the graphic, thus degrading quality). Plus you maintain any layers you created during the editing/correcting process.
Oh, and the ultra coolio St. Patrick's Day images in this tutorial are from the vast database over at iStockphoto.com.
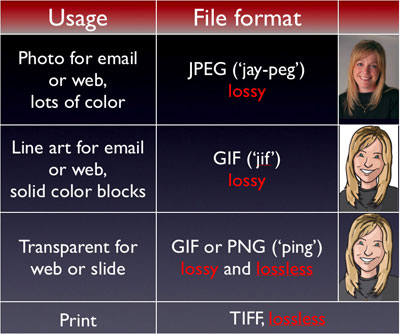
Rule 1: If it’s a photograph or if it contains a color blend (think gradient), save it as a .jpg. Realize that there is compression involved here, meaning when you save the image, you lose a little bit of quality (how much is determined by the settings you choose in the Export dialog box). This image type is called "lossy."
Rule 2: If you need the background to be transparent, save it as a .gif. There is compression here as well, making .gif "lossy" as well. Pronounce it like the peanut butter, Jiff. Really.
Rule 3: If it’s line art (black and white with no shades of gray) or flat color (no blends--think comic strips, black/white art, or coloring books), then save it as a .gif. If you want to have a see-through background (called a transparency), you must use a .gif.
Rule 4: If the image is destined to live life in presentation software like Keynote or PowerPoint, save it as a .png (pronounced ping). This is a lossless format that also supports transparency, like a .gif, which is very useful. You can certainly use .png images on the web, though, some browsers don't display the transparency correctly. Furthermore, because .png images are lossless, they tend to be bigger in file size than a .gif or .jpg.
Here's a handy chart from a graphics class I taught at Macworld in January:
That being said, there are tricks to know about each format to squeeze their sizes down even further. Here are a few:
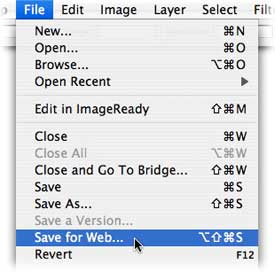
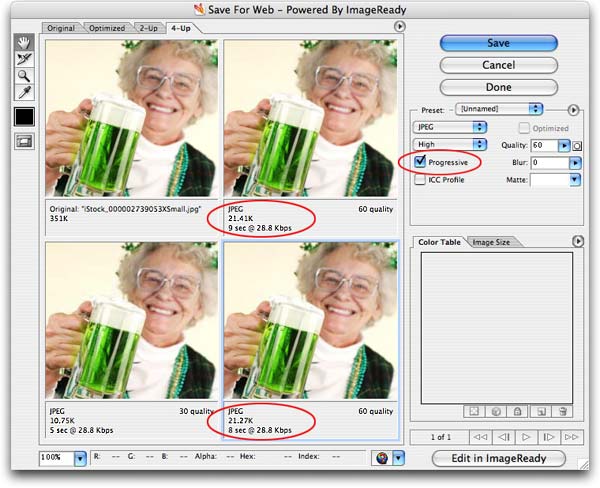
Tip 1: Always use the Save for Web option in either Photoshop or Elements. This dialog box gives you way more options and provides you with a 2 to 4-up preview panel, so you can see what you get before you get it.
Tip 2: When saving a .jpg, consider using the Progressive option. This will save only a few K of size, but hey, it's something. Instead of the browser having to download the entire image before the viewer sees it, a progressive .jpg will load a little bit at a time (row by row), sort of like a waterfall effect.
Tip 3: When saving a .gif or a .png, reduce the color palette. The fewer the colors, the smaller the file size will be.
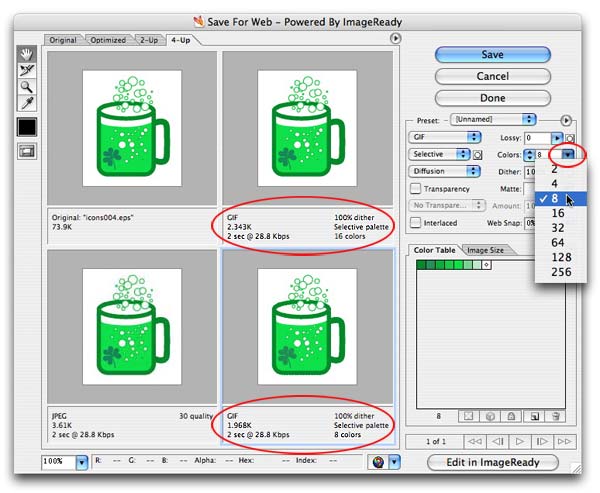
Using a .png, however, will result in a larger file size, as you can see below (2.34k vs. 6.57k):

Tip 4: Crop the image closely before you even think about choosing Save for Web. Zap any extra pixels you can!
Not everyone has high-speed (yet), so it's important to remember to size graphics in a considerate manner. Resist the urge to put large graphics on your web pages. Some good rules of thumb for online image sizes are as follows (all in pixels):
| Usage | Pixel dimensions |
| Email/web: super size photo | 640 x 480 |
| Email/web: Large photo | 320 x 240 |
| Web: Medium photo | 150 x 200 |
| Web: Headshots | 100 x 100 |
| Web: Thumbnails | 80 x 60 |
| Presentation slides | To cover entire slide, get the pixel dimenions of the projector or plasma on which the preso will be delivered |
Don’t let your HTML code resize your graphics; this takes a browser slightly longer to render. Go ahead and size down the graphic to the exact pixel dimensions you’ll use in your web page. By the way, Adobe GoLive CS will do this automatically for you.
If you’re somewhat visual, you may not want to fool around with the number of pixels to figure out what size your image needs to be. Simply use the zoom in and zoom out commands in Photoshop (Command + and Command -), and when you’re viewing the image at your target size onscreen, simply make a note of the percentage that shows in the title bar of your document. You can dial that percentage right into Photoshop. Here's how:
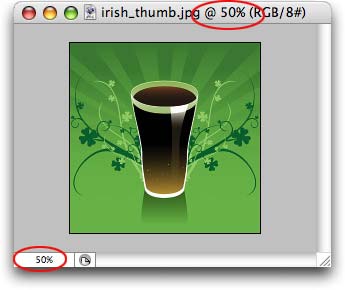
Step 1: Open the offending image you wish to edit. In our case, it’s a shot of some scrumptious green beer in honor of St. Patty's Day.
Step 2: Zoom in and/or out by pressing Command + and Command - until you get the size you want (or use the Zoom tool--looks like a magnifying glass). Make a note of the percentage showing in the title bar. For us, it’s 50%.
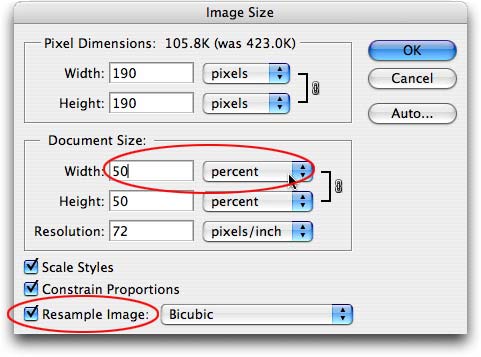
Step 3: From the Image menu, choose Image Size, and make sure that Resample Image is checked, and Constrain Proportions, now that I think about it. Change the Document Size measurement from inches (default setting) to percent and enter the same percentage as in your title bar and click Okay.
Tada! That’s all there is to it. Until next time, happy graphic trails!


PhotoLesa's photography gear provided by: