
PhotoLesa's photography gear provided by:


Today I'm going to share with you a trick the pros use for composing truly visually pleasing photos. It's called the rule of thirds. It's a wonderful guideline to follow when composing a shot with your camera, and when cropping. If you're familiar with this rule already, you might be interested to know that there's a way to crop photos to this rule *perfectly* in Photoshop.
What in the name of Thor gave me the idea for this tutorial, you might ask? Well, it's the Panasonic Lumix DMC-TZ3 camera I've been reviewing this past week. The 3-inch LCD on the back (yes, 3-inch) has a display mode with a grid exactly like what I'm about to show you. It's fantastic for creating a composition that works on the spot, and most new point and shoot cameras have it. Read on!
First, let's talk a moment about what the rule means and then I'll show you how to use it when cropping photos.
It's a compositional rule of thumb used in both photography and video production. Basically, every image can be divided into nine equal parts using two equally-spaced horizontal and vertical lines. By positioning elements of an image onto the *intersections* of these lines, you can create a more interesting and visually pleasing shots. You'll see it used on photos of people, places, and things, and even on film and TV.
To illustrate, I've laid a pinkish grid atop these pro-level photos from iStockphoto. See how the interesting bits of the photos match up with the intersecting lines?
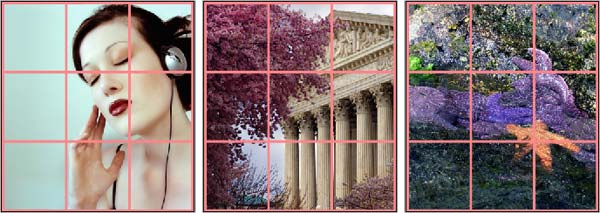
The samples I'm showing you are square, but the same rule applies if you're working with a 4:3 aspect ratio.
Finding the grid
Let's say you've taken a photo and you didn't compose it perfectly using the rule of thirds. No big deal. There lies a hidden grid within Photoshop's vector shapes that you can overlay onto your images for use in cropping. Here's how.
Step 1: Open a Soon To Be Cropped Beautifully and Perfectly To The Rule of Thirds photograph (whew that was long!).
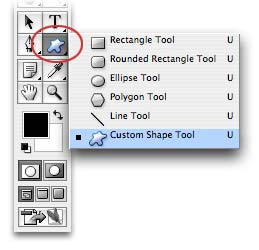
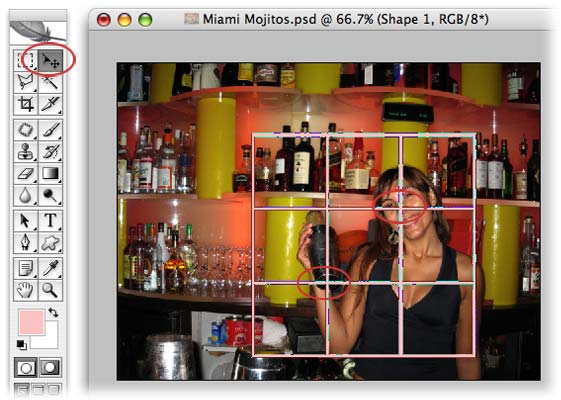
Step 2: Select the Custom Vector Shape Tool in the Toolbar, as shown below.
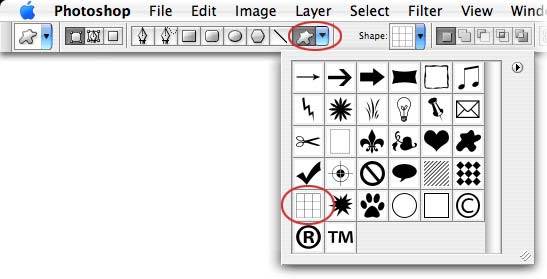
Step 3: From the options bar at the top of your screen, click the shape pop-up menu and scroll down until you find the grid below, and click once to select it.
Step 4: Click the foreground color chip in the Toolbar and choose a color you'll be able to see well over the photo. This is the color your grid will be (I typically pick something much lighter than the photo itself, like a pale pink).
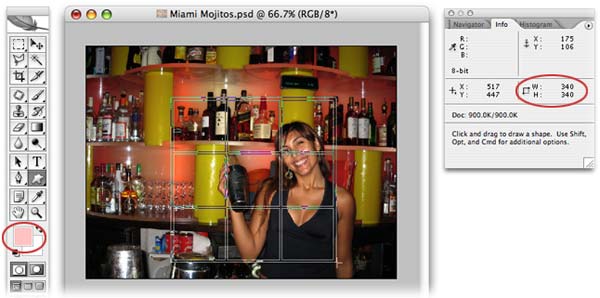
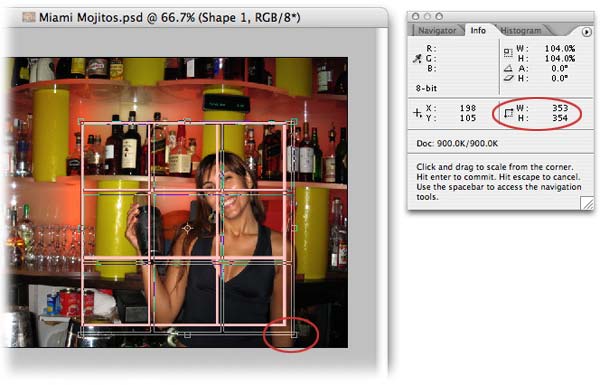
Step 5: With the Info palette open (choose Window > Info palette, or press F8), click and drag to draw the grid onto your photo. As you drag, watch the height and width on the Info palette (circled below in red). This lets you know what size grid you're creating (shown here in pixels). It's great for ensuring you keep the image just the right size. TIP: Press and hold the Shift key to draw a perfectly square grid.
As soon as you let go of the mouse, you'll see the grid shape appear. At this point, you can move it around and/or resize it.
Step 6: Press V to select the Move tool and drag the shape to just the right spot. As you can see below, I've placed one intersection almost squarely on her nose, which another centered on her drink shaking arm :)
Step 7: Resize the grid by pressing Command + T (PC: Ctrl + T) to invoke Free Transform. Drag any of the handles to resize the grid (you'll see the dimensions in the Info palette change). Again, holding the Shift key while dragging will resize the grid into a perfect square. Press Return to accept the transform.
When everything is just right, crop the image.
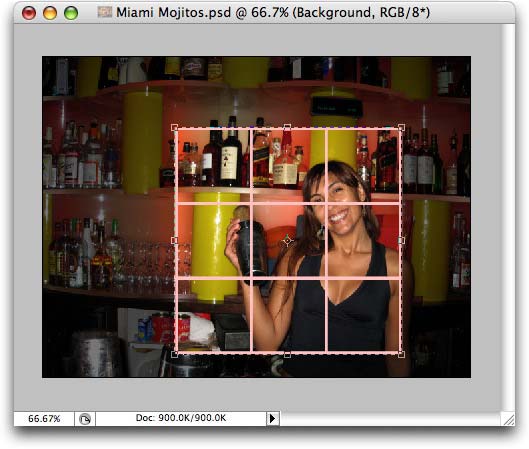
Step 8: Select the photo layer in the Layers Palette, then press C to select the Crop tool. Draw a crop box around the grid and press Return to accept. NOTE: Alternatively, you could use the Rectangular Marquee to draw a selection and then choose Edit > Crop.
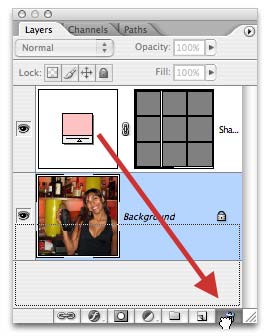
Step 9: Back in the Layers Palette, you're free to toss the vector shape layer by dragging it into the trash.
As you can see, we've ended up with a rather fetching crop (of course, it didn't hurt that the photo was of a beautiful woman to begin with!).

Now that you recognize the rule, you'll start noticing it everywhere—in stills, in video, in magazine ads—and you'll notice when it's *not* being used too! It's truly amazing what a difference this little trick makes. Until next time, happy cropping!


PhotoLesa's photography gear provided by: