
PhotoLesa's photography gear provided by:


If you’re experimenting with color, an easy and nondestructive way to do it is to create a Hue/Saturation adjustment layer. The Hue/Saturatoin dialog box itself offers a friendly set of sliders that are easy and fun to play around with, and you don’t even have to select your object first. Because it’s an adjustment layer, the color change takes place on its own layer, leaving your original image unharmed. And since a layer mask tags along with it automatically, you can use it to hide the color change from certain parts of your image. What more could you ask for?
With a Hue/Saturation adjustment layer, you can tweak these settings:
At the top of the Hue/Saturation dialog box there lies an Edit pop-up menu which lets you choose what colors you want to change. From the factory it’s set to Master, which means every color in your image will change. If you want to change just the reds, yellows, greens, and so on, pick ‘em from this list first.
If you want to get even more specific, notice the eyedroppers toward the bottom of the dialog box. They let you target certain ranges of color, which lets you be more exacting about the colors you change. Also at the bottom of the are two rainbow bars that show all the colors in the color wheel. The top one represents the colors in your original image and the bottom one shows you what those colors are being changed to in real-time (you can watch the bottom bar slide from left to right as you tweak the Hue slider).
Note: If you’ve got a terribly nasty color cast that you can’t get rid of, create a Hue/Saturation adjustment layer and choose the offending color from the pop-up menu. Drag the saturation slider to the left until the color cast is gone.
For example, let’s say you’re thinking about changing hair color. Arguably, it’s a heck of a lot safer to do your experimenting in Photoshop rather than on your head. Here’s how to do it:
Step 1: Open your image and leave the Background layer locked.
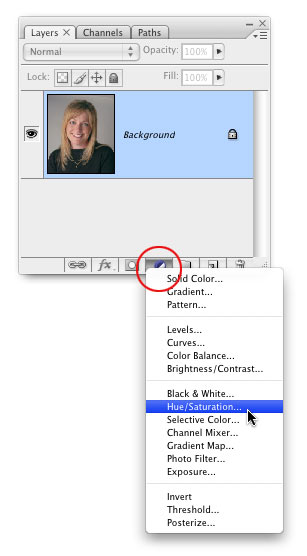
Step 2: Create a Hue/Saturation adjustment layer by clicking the half black/half white button at the bottom of your Layers palette.
Step 3: From the edit pop-up menu, choose the set of colors you want to change. You’ll find six generic colors in the list, so just pick the one that’s the closest match to the one you want to change. Grab the Eyedropper tool and click the offending color in your image.
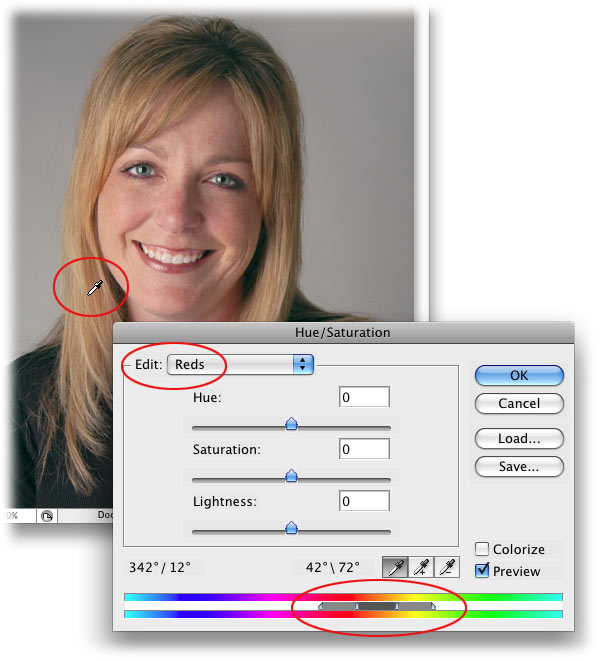
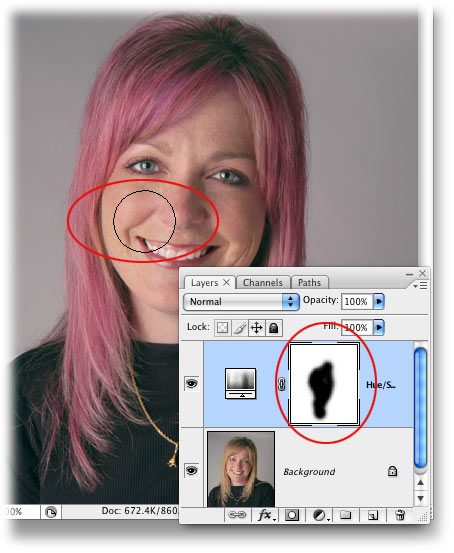
Select the Eyedropper on the left and then mouse over to your image and click within the hair. Immediately you’ll see a gray bar with little half triangles appear beneath the first rainbow bar. These little sliders represent the colors you’ve targeted, as shown above (circled in red). If you want to narrow the range, you can drag the little half triangles inward. To widen the range, drag them outward. You can also use the add/subtract eyedroppers and click within your image to add or subtract colors from the targeted range. If you’ve still got the Eyedropper tool selected, Shift-clicking will add colors to the range and Option-clicking (Alt-clicking on a PC) will subtract colors (you’ll see a tiny +/– sign appear beside your cursor).
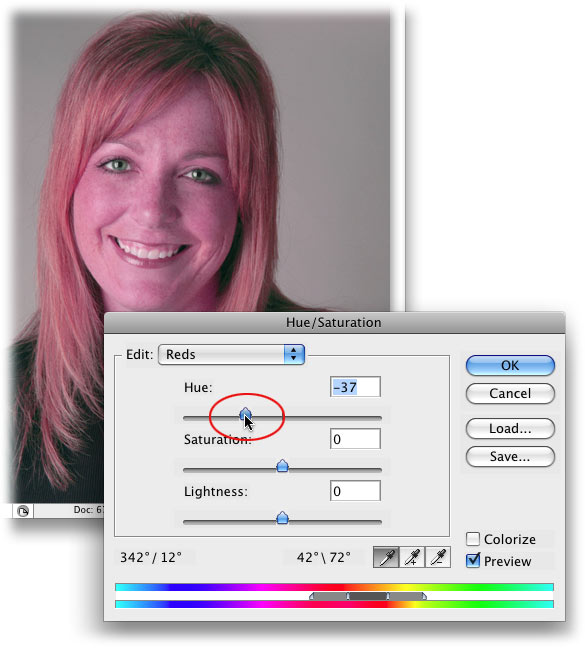
Step 4: Recolor your hair by tweaking the Hue, Saturation, and Lightness sliders however you’d like.
Tip: If the gray bar representing your targeted color range gets split between both ends of the color bar, Command-drag (Ctrl-drag on a PC) the color bar to the left or right until the range indicator appears in one piece.
Step 5: Since there’s bound to be areas of your skin that are similar in color to your hair, you can use the adjustment layer’s mask to hide the color change from those areas. In your Layers palette, just select the mask thumbnail, press B to grab the Brush tool, and set your foreground color chip to black (press X if you need to flip-flop color chips). Mouse over to your image and paint those areas to hide the adjustment. If you hide too much, flip-flop your color chips and paint that area with white.
Tip: If you want to go back and edit your Hue/Saturation adjustment later, remember to change the edit pop-up menu because it resets itself back to Master every time you open it.
Feel free to duplicate the adjustment layer however many times you want and tweak the sliders until you have experiemented with all kinds of hair color:
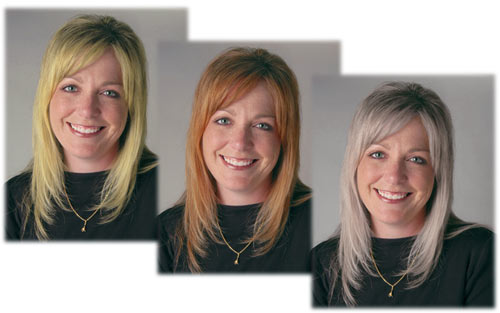
Now you're ready to head to the beauty shop. Until next time, happy hair-coloring!


PhotoLesa's photography gear provided by: