
PhotoLesa's photography gear provided by:


We've all seen the effect before: The screen of a computer monitor, TV, cell phone or digital camera display has been altered; that is, the picture you see on the screen has been simulated -- it's not what was originally there. This is a fun technique that's really quite useful, especially when creating advertising materials containing product shots or electronics in the background.
In part 1 of this tutorial series, we'll tackle flat screen devices, like the LCD of a digital camera. I'll show you how to easily make a selection of the screen, using a tool you might not expect, and how to pop another picture inside.
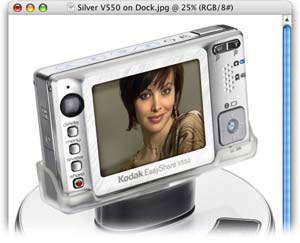
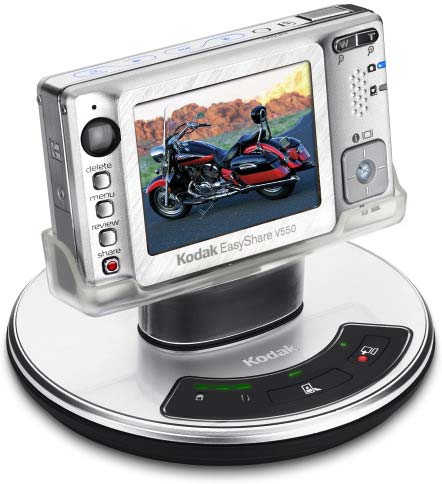
Step 1: Pop open the photo of a device with a flat screen in Photoshop. Spend a few moments staring at the screen portion and decide which selection tool is best suited for the task. If you're selecting by color, go for the Magic Wand (if the screen is black). If you're selecting something square, start with the rectangular marquee. If it's odd-shaped, one of the Lasso tools might be a good choice.
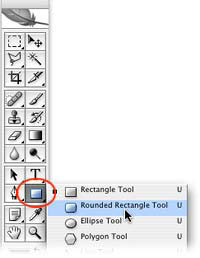
Step 2: Since the screen in our example has rounded edges, I'm going to reach for the Rounded Rectangle tool, nestled snuggly within Vector Shapes toward the bottom of the Toolbar. You might surprised by this choice, but trust me, you'll see why it's so useful in a minute.
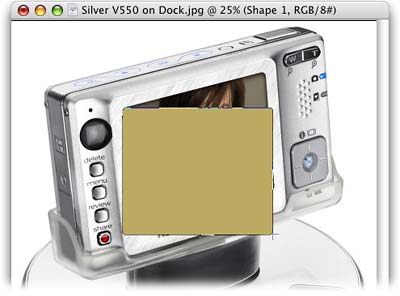
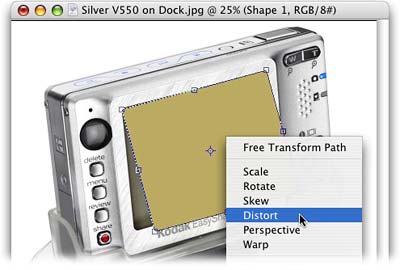
Step 3: Draw a rectangle roughly the size of the screen. The beauty of using a vector shape to create our selection is that we can use Free Transform to resize and distort it to fit our screen easily, as you'll see in the next step.
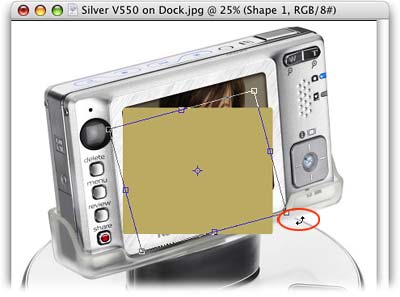
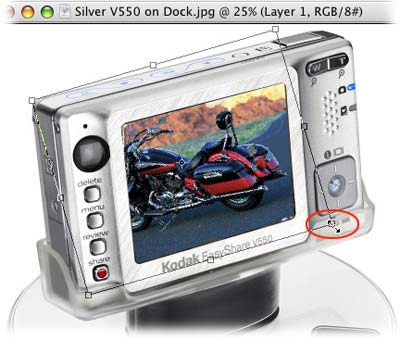
Step 4: Press Command + T (PC: Ctrl + T) to invoke Free Transform. Position the cursor just below the bottom right corner and drag upward to get the right angle. With the hard lines on the bottom of the camera body itself, it's easy to to line up the new shape.
Step 5: While still in Free Transform mode, drag the shape upwards so that it's touching the top of the camera screen. Control click (PC: Right click) within the shape to product the contextual menu, and choose Distort.
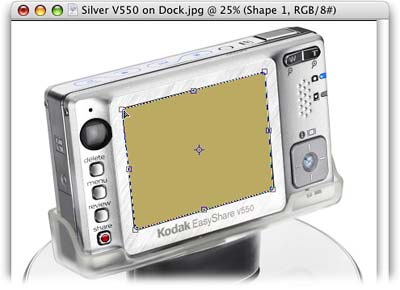
Drag each corner handle into place to match the camera screen. NOTE: You might need to drag them inward just a touch so you can see where the screen corners really are. When finished, press Return to accept the transform.
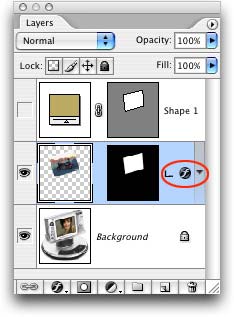
Step 6: Select the vector shape by Command clicking its layer (PC: Ctrl click). You should now see marching ants appear around the shape. Turn off the visibility of the vector shape layer, or drag the layer into the trash. That's right, you can cast it aside because we're through with it (we only used it for the shape). Select the Background layer and read on. This is what my document and layers palette looks like now:
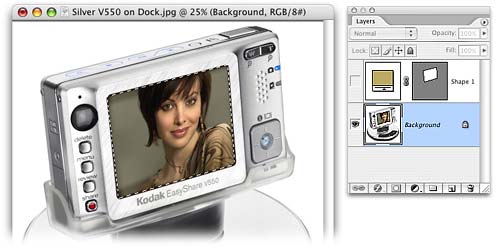
See what a nice selection we have? Because the rounded rectangle vector creates an actual *shape* we were able to transform the heck out of it to fit the camera screen perfectly.
Step 7: Pop open the photo you want to place inside the screen and press Command + A (PC: Ctrl + A) to Select All. Press Command + C (PC: Ctrl + C) to copy the picture.
Step 8: Hop back over to the camera document (you should still see marching ants around the screen area) and choose Edit > Paste Into.

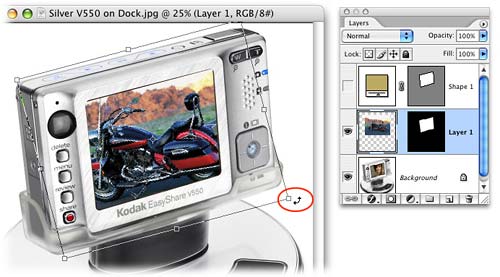
You should now see the new picture appear inside the camera screen. Notice how Photoshop created a new layer for you in the Layers Palette.
Step 9: Select this new layer and press Command + T to invoke Free Transform. Position the cursor just below the bottom right handle and drag upward until the angle of the new picture matches that of the screen. Again, the hard lines of the camera body itself make this pretty easy.
Step 10: While you're still in Free Transform mode, press and hold the Shift key while dragging inward on any of the corner handles to resize the picture proportionately. Do this with each handle until the picture fits just right, then release the Shift key and move the picture into place. When you're satisfied, press Return to accept the transform.
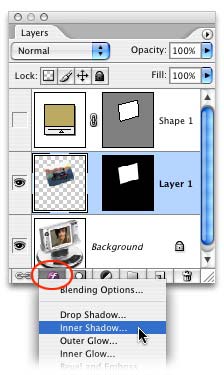
Step 11: To make the simulated picture look like it's really inside the screen, add an inner shadow by pressing the cursive "f" at the bottom of the Layers Palette, and choose Inner Shadow from the pop-up menu.
Step 12: I wanted the shadow to be small and subtle, so I entered a Distance of 3 and a Size of 10 pixels, then lowered the Opacity just a bit. These settings will vary, depending upon the resolution of the image you're working on.

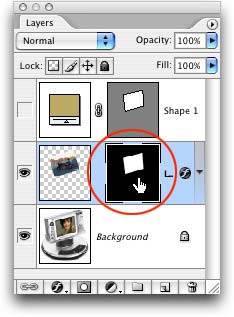
Step 13: Let's soften the edge of the new picture to make it blend in with the camera. To do so, select the layer mask thumbnail, as shown below.
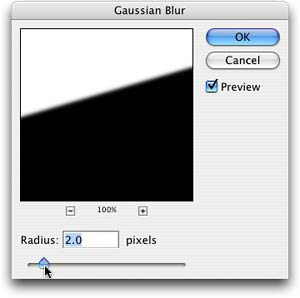
Step 14: Choose Filter > Blur > Guassian Blur, and enter a radius of 2 pixels. Press OK.
If after blurring the mask your shadow looks a bit too intense, just double click the little "f" next to the mask in the Layers Palette and adjust its settings. In this example, I went back and lowered the opacity of the inner shadow to 50%.
Last but not least, sit back and behold your masterpiece. We now have a simulated photo that, in my humble opinion, looks more realistic than the one Kodak made. Plus, we harmed nary a pixel in the process; a quick peek in the Layers Palette will reveal the original photo still protectively locked away in the Background layer.
Until next time, happy picture simulating :)


PhotoLesa's photography gear provided by: