
PhotoLesa's photography gear provided by:


Get ready kids! Here comes possibly the most requested Photoshop tutorial ever: How to make yourself (or another) into a silhouette like Apple's iPod ads. I held off as long as I could, but we all know it was bound to happen (thanks to Tucker MacDonald for finally pushing me over the edge).
Truth be told, this technique is really easy--on the right type of photo, that is. If you're lucky, the person or object you wish to silhouette lives on a solid or white background, thus making them way easy to select with Channels (and believe me it's worth *retaking* the shot on a solid color background).
If not, well, you're left with the task of creating the selection by hand using the Background Eraser, the Lasso, the Extract filter, or (gasp) the evil Pen tool itself. (NOTE: Just kidding. I don't really think the pen tool is evil per say, just a bit persnickety.)
Besides being the "effect of the moment", creating the coveted silhouette is a neat effect to use for avatars (little icons used in instant messaging clients and in forums or bulletin boards), and perhaps as a framed gift for family or friends. I'm seeing tons of photographers creating matted silhouettes of profile shots for extra bucks. Um, that's about all I can think of :)
So, without further adue, here we go! I'm going to cheat and use a photo of a beautiful girl I found on iStockphoto.com after performing a search for "girl on white background."
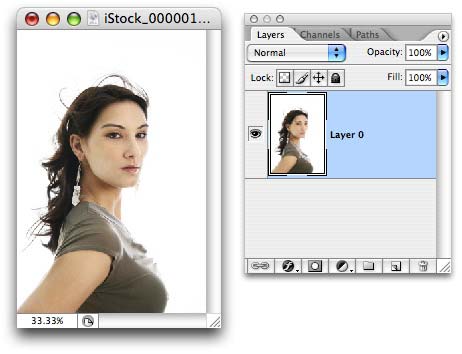
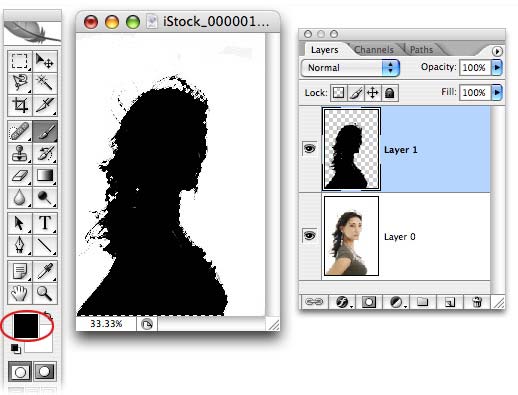
Step 1: Pop open a Soon To Be Silhouetted Photo and double-click the Background layer so it's editable.
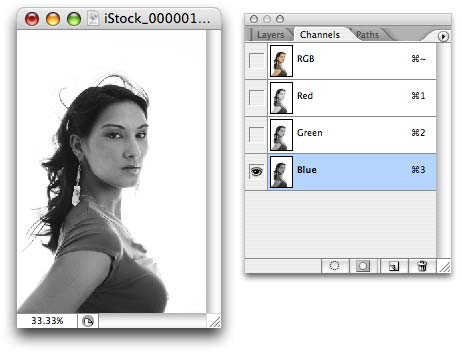
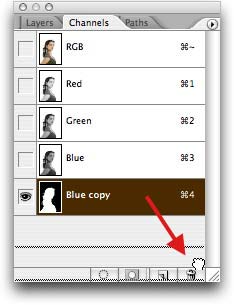
Step 2: The first step to making an easy selection is to locate the Darkest Channel of Them All. Cycle through all the color channels by pressing Command + 1, Command + 2, Command + 3 (PC: Ctrl + 1, 2, or 3). Stop when you land on the darkest one. Chances are that'll be the blue channel--and I've no idea why. Go ahead and click the Channels tab in the Layers Palette to see the lucky winner.
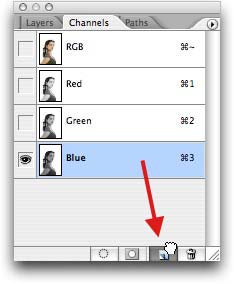
Step 3: Create a copy of the Blue channel by dragging it to the new layer icon at the bottom of the Layers Palette, as shown below.
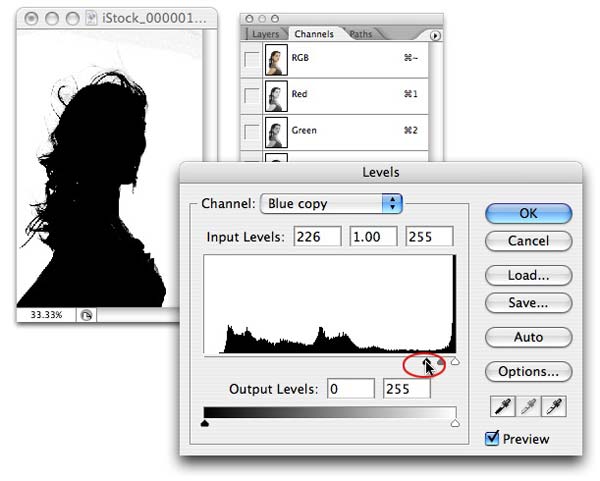
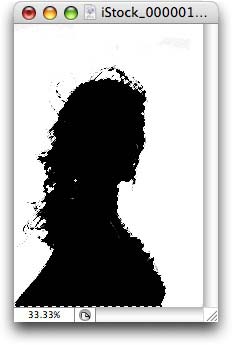
Step 4: Let us use Levels to make our silhouette completely black. Press Command + L (PC: Ctrl + L) to summon the Levels dialog box and drag the shadows slider to the right (circled below in red), until our girl becomes completely black.
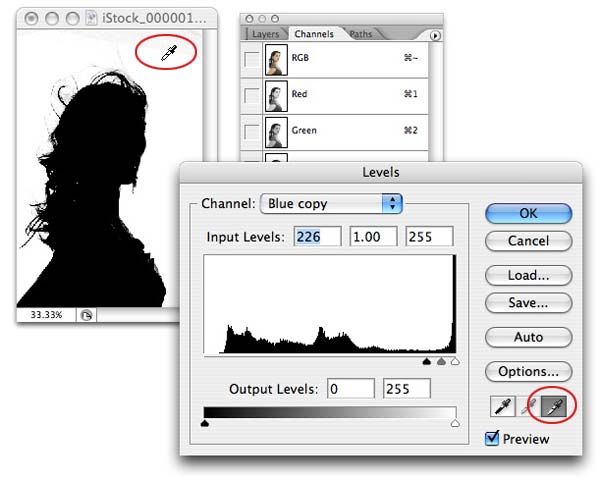
Step 5: We're almost there, but the background needs to be perfectly white too. To achieve this, click the highlight eye dropper (circled at right below) and click within the background of the image. Keep clicking in various places until the background goes completely white, or as close as possible.
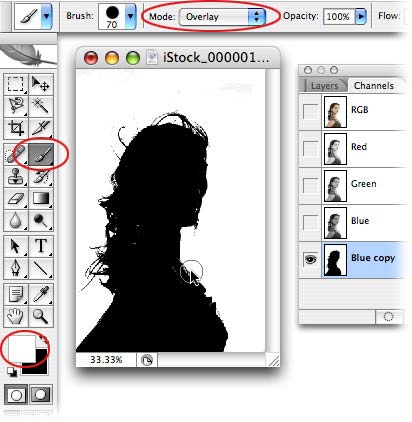
Step 6: If, for some reason, the background doesn't cooperate, you can brush it out. Press B to select the Brush tool and in the Options toolbar, change the Mode to Overlay. Make sure the top color chip is white at the bottom of the main Toolbox and just paint the background away. This will remove all the gray and if you touch the edges of the image, it'll make them nice and crispy (which is exactly what we want in a silhouette).
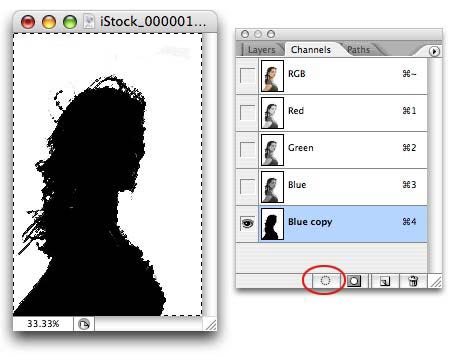
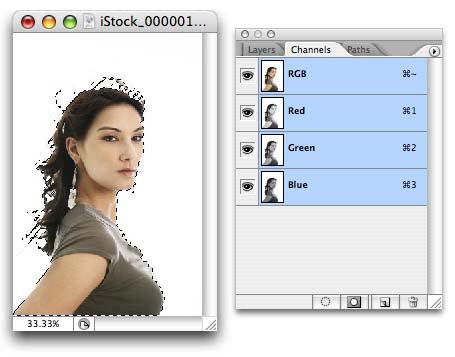
Step 7: Click the dotted circle icon at the bottom left of the Channels palette to bring on the marching ants.
Step 8: Invert the selection by choosing Selection > Inverse, or just press Command + Shift + I (PC: Ctrl + Shift + I). The marching ants should now appear around the silhouette instead of the background.
Step 9: We're finished with the Blue channel copy, so go ahead and drag it to the Trash icon at the bottom right of the Channels palette.
This is what we have now:
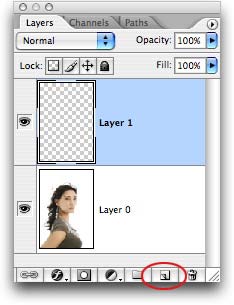
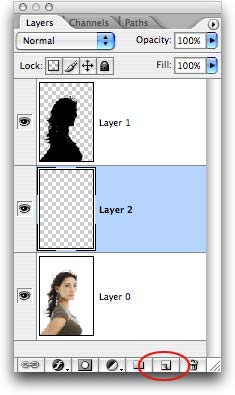
Step 10: Select the Layers tab in the palette, and press the new layer icon to create a home for our silhouette.
Step 11: Press D to set your color chips to the default of black and white, and press X until black is perched on top (as shown below). Fill the selection with black by pressing Option + Delete (PC: Alt + Delete). You should now have a black silhouette living on its own layer. Press Command + D (PC: Ctrl + D) to get rid of the marching ants.
Step 12: Let's make a home for a bright color background by creating a new layer beneath the new silhouette. Command click (PC: Ctrl click) the new layer icon at the bottom of the Layers Palette to create a new layer beneath the one currently selected.
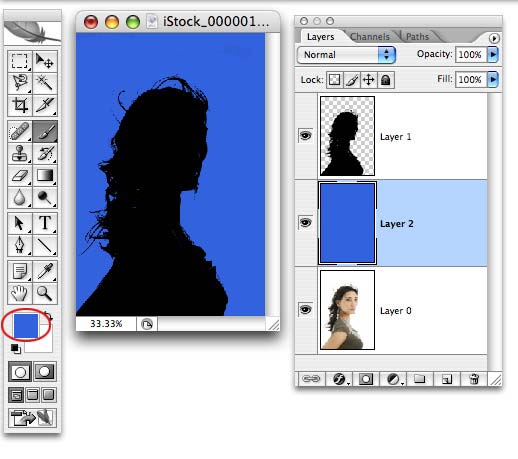
Step 13: Over in the main Toolbox, click the top color chip and pick a nice, bright color from the resulting Color Picker. Press Option + Delete (PC: Alt + Delete) to fill the layer with that color.
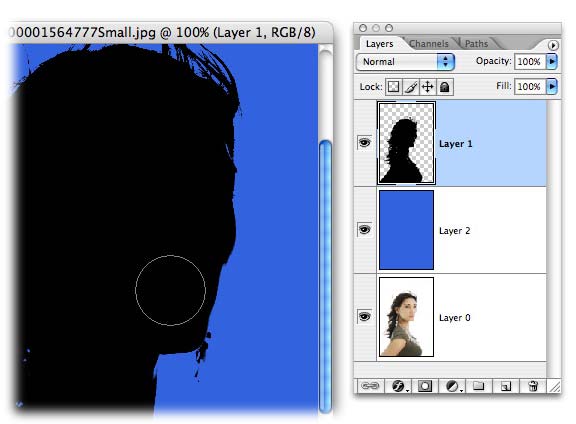
Step 14: If the silhouette needs touching up or enhancing in any way, just select that layer and use a Brush--with black as the top color chip, of course--to fill selected areas. Likewise, if you need to erase anything (like a dangling earring), just press E to select the Eraser tool and have at it.
Voila! Here we have it, a gorgeous silhouette complete with blowing hair:
Okay, so maybe I enhanced certain, ahem, *bits* of this particular silhouette (exactly where I won't say). That's all for now! Have fun with this effect and check back soon for more creative goodness :)


PhotoLesa's photography gear provided by: