
PhotoLesa's photography gear provided by:


Do Crest Whitening Strips make you gag? Do you lack the money to have molds made of your teeth for bleaching? No worries, my friends. In this third installment of The Basics of Retouching People series, I'm going to show you how to whiten your teeth (or anyone elses) with nary a trip to that evil sharp-tool wielding, white coat wearin' man we call the dentist.
We'll use the same photo of my girlfriend Leslie and I, so when this tutorial series is complete you can see how much digital surgery we've really done.
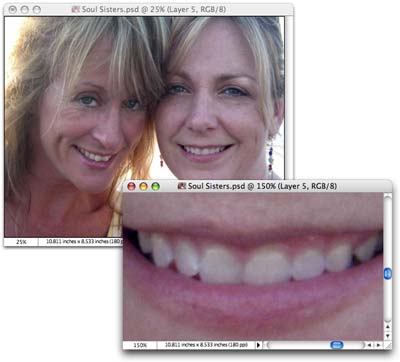
Before we get started, let's arrange our workspace so we have two identical windows opened with one zoomed really far in, and one at roughly the size the image might print.
Step 1: Open the offending photo in either Photoshop or Photoshop Elements (though the following screen shots are from Elements 4.0, the steps are identical in Photoshop CS2). Zoom into the photo by pressing Command + (PC: Ctrl + ).
Step 2: Open another window of the same photo by trotting up to the View menu and choosing New Window for [document name]. Keep this window at normal size. (In Photoshop CS2, choose Window > Arrange > New Window for [document name].)
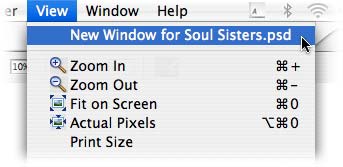
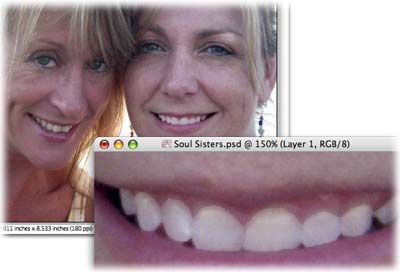
This little trick is great for doing detail work because when you're zoomed in really far, it's tough to tell what the actual result will be at normal size. Here's what my workspace looks like:
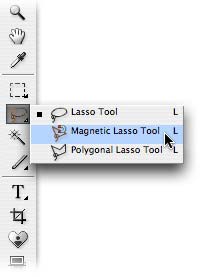
The process of whitening and brightening teeth is really easy; the toughest part is selecting the teeth themselves. Today, we'll use the Magnetic Lasso tool.
Step 3: Select the Magnetic Lasso tool, as shown below.
Step 4: Mouse over to the document and click once where you'd like to begin the selection. This will create an anchor point.
Step 5: Begin dragging the cursor rightward. Notice how the Magnetic Lasso tries to follow the line for you? It tries to guess what you're selecting. Keep clicking to set anchor points as needed, like when it loses the line or tries to go astray. Depending upon the amount of contrast between the item you're selecting and the background of the image, this tool can do a great job.
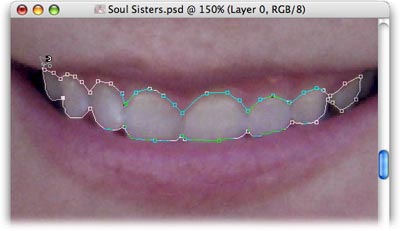
You can see from the number of points in the screen shot above that I set a fair amount of anchor points on the top portion of my teeth, but not as many on the bottom.
TIP: If the Magnetic Lasso sets an bad anchor point, just hover over it and press Delete (PC: Backspace).
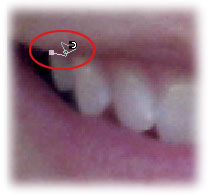
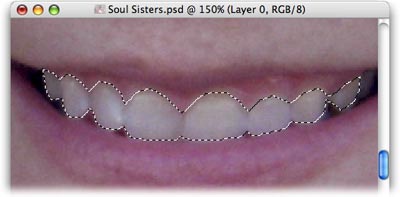
Step 6: To complete the selection, just hover over the very first anchor point and when you see a microscopic (seriously) circle appear below the magnet bit of the cursor, click once. We now have marching ants running 'round the teeth.
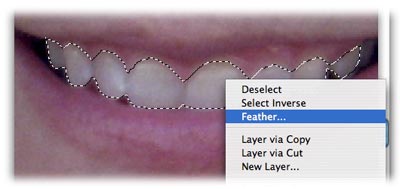
Step 7: Control click (PC: Alt click) within the selection to summon the ever-handy contextual menu and choose Feather. Enter 2 pixels and press OK. TIP: If you're working on a high resolution image, you may need to increase the feather amount.
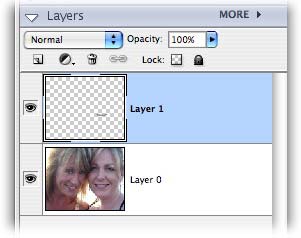
Step 8: Jump the teeth up onto their own layer by pressing Command + J (PC: Ctrl + J). This way we won't harm the original image with our dental work.
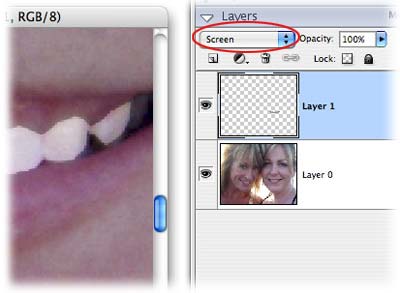
Step 9: With the teeth layer selected (it'll be a light blue in the Layers Palette), change its blend mode to Screen, as shown below. Brace yourself as the teeth will go STARK white as you can see below on the left.
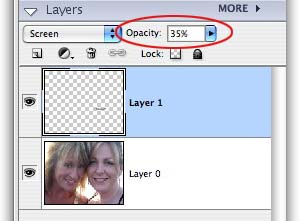
Step 10: To lessen the effect, just lower the opacity of the teeth layer to about 38% or so.
And here's what we have:
This method doesn't require putting the teeth on their own layer, as it uses an adjustment layer instead. You get the same effect, but slightly more control over the coloration of the teeth.
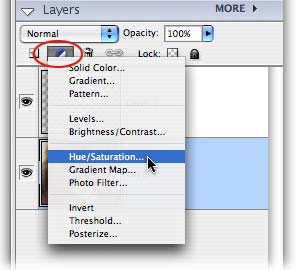
Step 1: After creating a selection of Leslie's teeth with the Magnetic Lasso, press the half black/half white circle to create a Hue/Saturation adjustment layer.
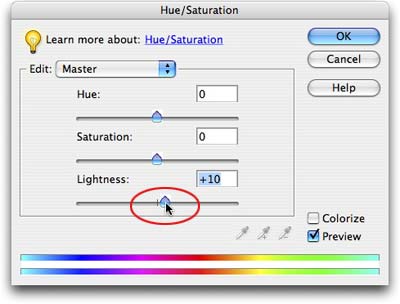
Step 2: In the resulting dialog box, drag the Lightness slider to the right to brighten the teeth.
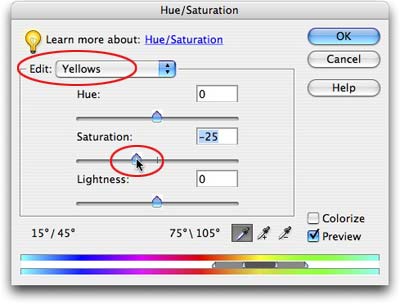
Step 3: If the teeth are slightly yellowish, you could select Yellow from the Edit menu and lower the saturation just a bit.
The beauty of this method is that you can just double-click the adjustment layer to continue tweaking the teeth.
Here's the finished product:
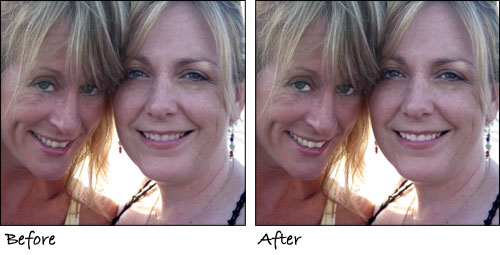
Fast and easy and wow, what a difference it makes! It's a great technique that can be applied to the whites of eyes as well, as you can see in the "after" photo above.
That's all for this week! Until next time, may the Photoshop force be with you :)


PhotoLesa's photography gear provided by: