
PhotoLesa's photography gear provided by:


 One of the frustrations that folks commonly face when scanning black & white documents is the appearance of "paper crud." This is when the bits that were supposed to be white end up a dirty-looking gray. This can simply be from imperfections in the paper, actual gunk on the paper, or a color cast from the scanner itself. Another problem is getting the document straight in the scanner to begin with. Luckily, both of these things are easily fixable in Photoshop Elements.
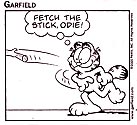
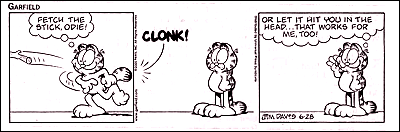
Step 1: Open the scanned image, in our case it's a Garfield comic, and make sure it's editable by double-clicking the Background layer in your layers palette.
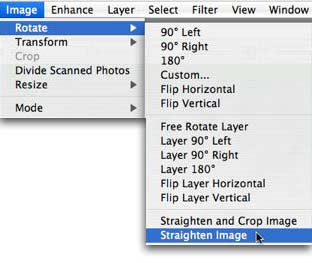
Step 2: I can see right off that my image is a mite crooked, so I'm going to trot up to the Image menu and choose Rotate > Straighten. (If it needs cropping, you can choose Straighten & Crop instead.)
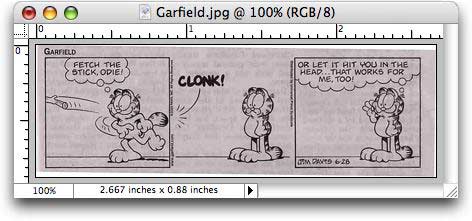
As you can see from the white edges below, Elements did a darn good job of straightening it up.
Step 3: Back in the layers palette, click on the half black/half white circle (to create an adjustment layer) and choose Levels. (You can do the exact same thing in Photoshop.)
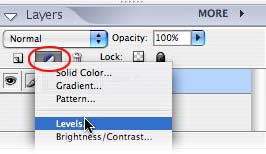
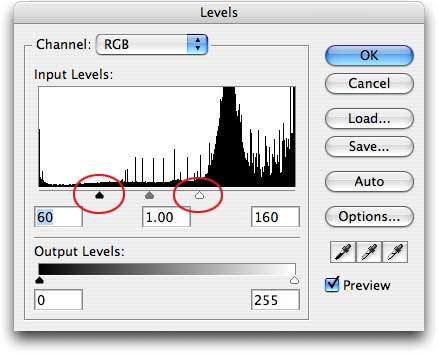
Step 4: In the resulting dialog box, we can make the white bits white again by grabbing the white slider on the far right, directly beneath the histogram (circled in red below) and pulling it to the left. Likewise, to make the black bits blacker, grab the black triangle on the left and pull it to the right. You can see below how much I had to pull both of these in to get Garfield back to black & white.
As you can see below, this trick works *wonders*!
Thanks again, Mama, for scanning this comic for me! This tutorial would not have been possible without you :)


PhotoLesa's photography gear provided by: